www.it-connect.fr

Install Graylog on Debian to easily centralize and analyze your logs
Table of Contents
I. Introduction
Graylog is an open source "log sink" solution designed to centralize, store and analyze logs from your machines and network devices in real time. In this tutorial, we'll learn how to install the free version of Graylog on a Debian 12 machine!
Within an information system, every server, whether running Linux or Windows, and every piece of network equipment (switch, router, firewall, etc.) generates its own logs, stored locally. Since logs are stored locally on each machine, analyzing and correlating events is very difficult... This is where Graylog comes in. It acts as a log sink, meaning that all your machines send it their logs (via syslog, for example). Graylog will then store and index these logs, while allowing you to perform global searches and create alerts.
Graylog is an analysis and monitoring tool that makes it easier to identify suspicious behavior and various problems (stability, performance, etc.).
Note : the free version, Graylog Open, is not a SIEM as Wazuh, for example, as it lacks real intrusion detection functions.
II. Prerequisites
The Graylog stack is based on several components that we'll need to install and configure. Here, we'll be installing all the components on the same server, but it is possible to create clusters based on several nodes and distribute the roles across several servers. For the purposes of this tutorial, we'll be installing Graylog 6.1, the most recent version to date.
- MongoDB 6, the current recommended version for Graylog (minimum 5.0.7, maximum 7.x)
- OpenSearch, an open source fork of Elasticsearch created by Amazon (minimum 1.1.x, maximum 2.15.x)
- OpenJDK 17
The Graylog server runs on Debian 12, but installation is possible on other distributions, including via Docker. The virtual machine is equipped with 8 GB RAM and 256 GB disk space, in order to have enough resources for all components (otherwise this can have a significant impact on performance). However, I'm only giving this as a rough guide, as the sizing of the Graylog architecture depends on the amount of information to be processed. Graylog can process 30 MB or 300 MB of data per day, or 300 GB of data per day... It's a scalable solution capable of handling terabytes of logs (see this page).

Before starting configuration, assign a static IP address to the Graylog machine and install the latest updates. Be sure to set the local machine's time zone and define an NTP server for date and time synchronization. Here is the command to execute:
sudo timedatectl set-timezone Europe/ParisNote :OpenSearch installation is optional if you use Graylog Data Node instead.
III Step-by-step installation of Graylog
Let's start by updating the package cache and installing the tools we need for what's to come.
sudo apt-get update
sudo apt-get install curl lsb-release ca-certificates gnupg2 pwgen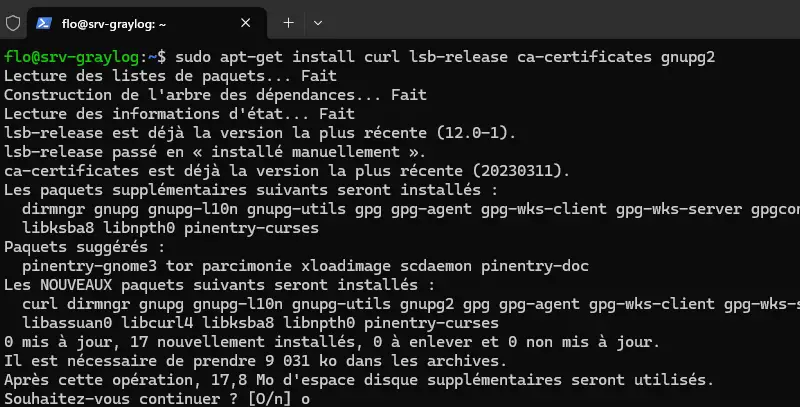
A. Installing MongoDB
Once that's done, we'll start installing MongoDB. Download the GPG key corresponding to the MongoDB repository:
curl -fsSL https://www.mongodb.org/static/pgp/server-6.0.asc | sudo gpg -o /usr/share/keyrings/mongodb-server-6.0.gpg --dearmorThen add the MongoDB 6 repository to the Debian 12 machine:
echo "deb [ signed-by=/usr/share/keyrings/mongodb-server-6.0.gpg] http://repo.mongodb.org/apt/debian bullseye/mongodb-org/6.0 main" | sudo tee /etc/apt/sources.list.d/mongodb-org-6.0.listNext, we'll update the package cache and attempt to install MongoDB :
sudo apt-get update
sudo apt-get install -y mongodb-org
MongoDB cannot be installed, as a dependency is missing: libssl1.1. We'll have to install this package manually before we can proceed, as Debian 12 doesn't have it in its repositories.
Les paquets suivants contiennent des dépendances non satisfaites :
 mongodb-org-mongos : Dépend: libssl1.1 (>= 1.1.1) mais il n'est pas installable
 mongodb-org-server : Dépend: libssl1.1 (>= 1.1.1) mais il n'est pas installable
E: Impossible de corriger les problèmes, des paquets défectueux sont en mode « garder en l'état ».
We're going to download the DEB package named "libssl1.1_1.1.1f-1ubuntu2.23_amd64.deb" (latest version) with the wget command, then install it with the dpkg command. This produces the following two commands:
wget http://archive.ubuntu.com/ubuntu/pool/main/o/openssl/libssl1.1_1.1.1f-1ubuntu2.23_amd64.deb
sudo dpkg -i libssl1.1_1.1.1f-1ubuntu2.23_amd64.deb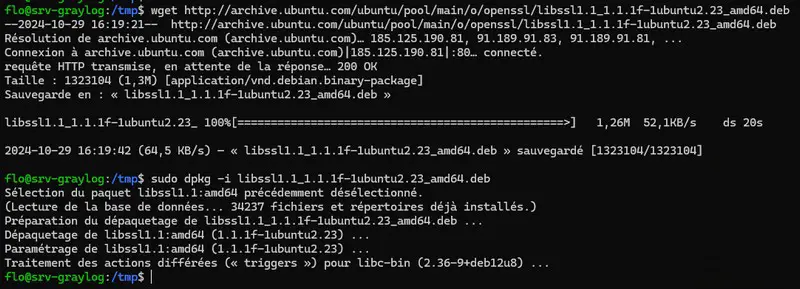
Restart MongoDB installation:
sudo apt-get install -y mongodb-orgThen restart the MongoDB service and enable it to start automatically when the Debian server is launched.
sudo systemctl daemon-reload
sudo systemctl enable mongod.service
sudo systemctl restart mongod.service
sudo systemctl --type=service --state=active | grep mongod
With MongoDB installed, we can move on to installing the next component.
B. Installing OpenSearch
Let's move on to installing OpenSearch on the server. The following command adds the signature key for OpenSearch packages:
curl -o- https://artifacts.opensearch.org/publickeys/opensearch.pgp | sudo gpg --dearmor --batch --yes -o /usr/share/keyrings/opensearch-keyringThen add the OpenSearch repository so that we can download the package with apt later:
echo "deb [signed-by=/usr/share/keyrings/opensearch-keyring] https://artifacts.opensearch.org/releases/bundle/opensearch/2.x/apt stable main" | sudo tee /etc/apt/sources.list.d/opensearch-2.x.listUpdate your package cache :
sudo apt-get updateThen install OpenSearch, taking care to set the default password for your instance's Admin account . Here, the password is "IT-Connect2024!", but replace this value with a strong password. Avoid weak passwords like "P@ssword123" and use at least 8 characters with at least one character of each type (lowercase, uppercase, number and special character), otherwise there will be an error at the end of the installation. This is a prerequisite since OpenSearch 2.12.
sudo env OPENSEARCH_INITIAL_ADMIN_PASSWORD=IT-Connect2024! apt-get install opensearchPlease be patient during installation...
When you've finished, take a moment to perform the minimum configuration. Open the configuration file in YAML format:
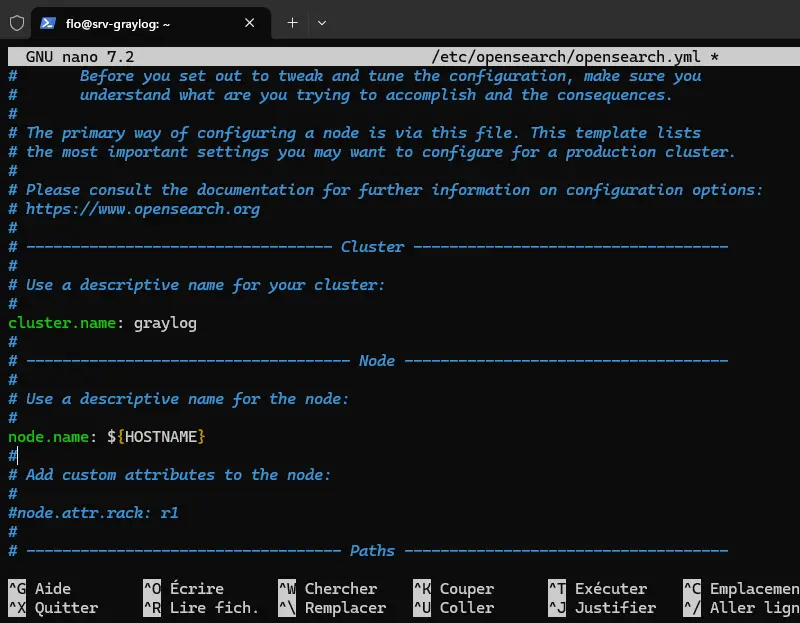
sudo nano /etc/opensearch/opensearch.ymlWhen the file is open, set the following options:
cluster.name: graylog
node.name: ${HOSTNAME}
path.data: /var/lib/opensearch
path.logs: /var/log/opensearch
discovery.type: single-node
network.host: 127.0.0.1
action.auto_create_index: false
plugins.security.disabled: true
This OpenSearch configuration is designed to set up a single node. Here are some explanations of the different parameters we use:
- cluster.name: graylog : this parameter names the OpenSearch cluster with the name "graylog".
- node.name: ${HOSTNAME} : the node name is set dynamically to match that of the local Linux machine. Even if we only have one node, it's important to name it correctly.
- path.data: /var/lib/opensearch : this path specifies where OpenSearch stores its data on the local machine, in this case in "/var/lib/opensearch".
- path.logs: /var/log/opensearch : this path defines where OpenSearch log files are stored, here in "/var/log/opensearch".
- discovery.type: single-node : this parameter configures OpenSearch to work with a single node, hence the choice of the "single-node" option.
- network.host: 127.0.0.1: this configuration means that OpenSearch only listens on its local loopback interface, which is sufficient since it's on the same server as Graylog.
- action.auto_create_index: false : by disabling automatic index creation, OpenSearch will not automatically create an index when a document is sent without an existing index.
- plugins.security.disabled: true: this option disables the OpenSearch security plug-in, meaning that there will be no authentication, access management or communication encryption. This setting saves time when setting up Graylog, but should be avoided in production (see this page).
Some options are already present, so you simply need to remove the "#" to activate them, then indicate your value. If you can't find an option, you can declare it directly at the end of the file.
Save and close this file.
C. Configure Java (JVM)
You need to configure the Java Virtual Machine used by OpenSearch in order to adjust the amount of memory this service can use. Edit the following configuration file:
sudo nano /etc/opensearch/jvm.optionsWith the configuration deployed here, OpenSearch will start with 4 GB of allocated memory and can grow up to 4 GB, so there will be no memory variation during operation. Here, the configuration takes into account the fact that the virtual machine has a total of 8 GB of RAM. Both parameters must have the same value. This means replacing the lines :
-Xms1g
-Xmx1g
With these lines :
-Xms4g
-Xmx4g
Here is an image of the modification to be made:
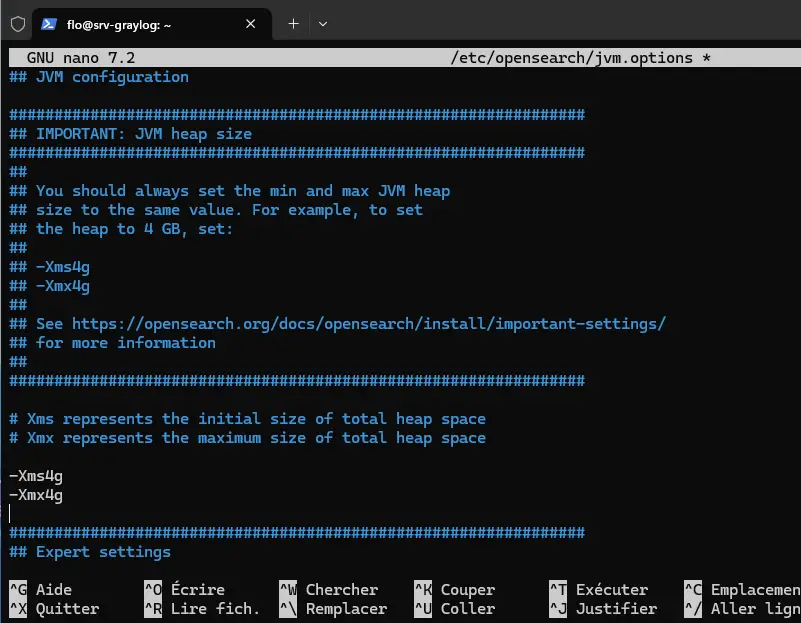
Close this file after saving it.
In addition, we need to check the configuration of the "max_map_count" parameter in the Linux kernel. It defines the limit of memory areas mapped per process, in order to meet the needs of our application. OpenSearch, like Elasticsearch, recommends setting this value to "262144" to avoid memory management errors.
In principle, on a freshly installed Debian 12 machine, the value is already correct. But let's check. Run this command:
cat /proc/sys/vm/max_map_countIf you get a value other than "262144", run the following command, otherwise it's not necessary.
sudo sysctl -w vm.max_map_count=262144Finally, enable OpenSearch autostart and launch the associated service.
sudo systemctl daemon-reload
sudo systemctl enable opensearch
sudo systemctl restart opensearch
If you display your system status, you should see a Java process with 4 GB RAM.
top
Next step: the long-awaited installation of Graylog!
D. Installing Graylog
To install the latest version of Graylog 6.1 , run the following 4 commands to download and install Graylog Server:
wget https://packages.graylog2.org/repo/packages/graylog-6.1-repository_latest.deb
sudo dpkg -i graylog-6.1-repository_latest.deb
sudo apt-get update
sudo apt-get install graylog-server
When this is done, we need to make some changes to Graylog's configuration before trying to launch it.
Let's start by configuring these two options:
- password_secret : this parameter is used to define a key used by Graylog to secure the storage of user passwords (in the spirit of a salting key). This key must be unique and random.
- root_password_sha2 : this parameter corresponds to the default administrator password in Graylog. It is stored as a SHA-256 hash.
We'll start by generating a 96-character key for the password_secret parameter:
pwgen -N 1 -s 96
wVSGYwOmwBIDmtQvGzSuBevWoXe0MWpNWCzhorBfvMMhia2zIjHguTbfl4uXZJdHOA0EEb1sOXJTZKINhIIBm3V57vwfQV59
Copy the returned value, then open the Graylog configuration file:
sudo nano /etc/graylog/server/server.confPaste the key into the password_secret parameter, like this:
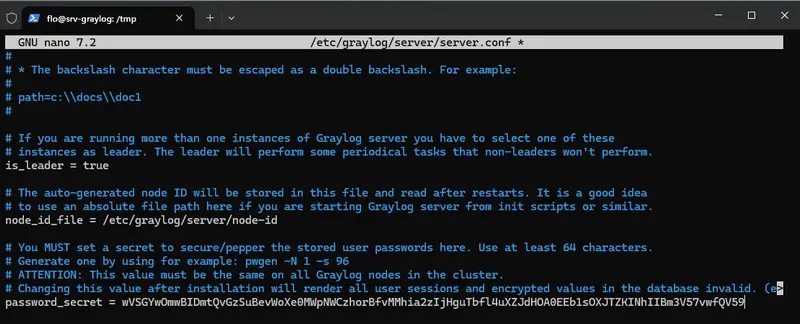
Save and close the file.
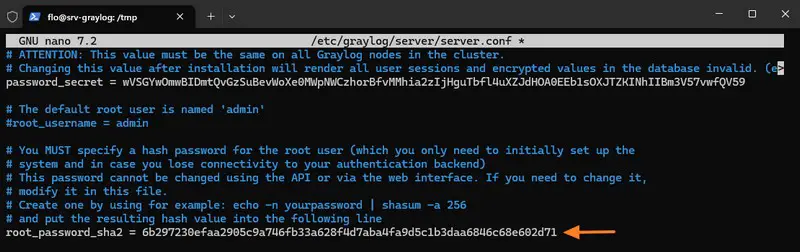
Next, you need to set the password for the "admin" account created by default. In the configuration file, it's the password hash that must be stored, which means calculating it. The example below gives the hash of the password "PuitsDeLogs@": adapt the value to your password.
echo -n "PuitsDeLogs@" | shasum -a 256
6b297230efaa2905c9a746fb33a628f4d7aba4fa9d5c1b3daa6846c68e602d71
Copy the value obtained as output (without the hyphen at the end of the line).
Open the Graylog configuration file again:
sudo nano /etc/graylog/server/server.confPaste the value into the root_password_sha2 option like this:
While you're in the configuration file, set the "http_bind_address" option. Specify "0.0.0.0:9000" so that Graylog's web interface can be accessed on port 9000, via any IP address on the server.

Then set the "elasticsearch_hosts" option to "http://127.0.0.1:9200" to declare our local OpenSearch instance. This is necessary, as we're not using a Graylog Data Node. And without this option, it won't be possible to go any further...

Save and close the file.
This command activates Graylog so that it starts automatically on next boot, and immediately launches the Graylog server.
sudo systemctl enable --now graylog-serverOnce this is done, try to connect to Graylog from a browser. Enter the server's IP address (or name) and port 9000.
For your information :
Not so long ago, an authentication window similar to the one below appeared when you first logged on to Graylog. You had to enter your "admin" login and password. And then you'd be unpleasantly surprised to find that the connection didn't work.
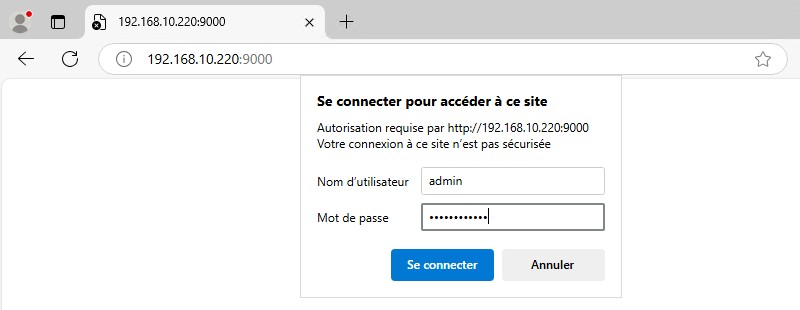
It was necessary to go back to the command line on the Graylog server and consult the logs. We could then see that for the first connection, it's necessary to use a temporary password, specified in the logs.
tail -f /var/log/graylog-server/server.log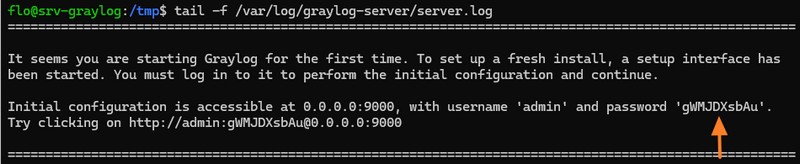
You then had to retry a connection with the user "admin" and the temporary password, and that allowed you to log in!
This is no longer the case. Simply log in with your admin account and the password configured on the command line.

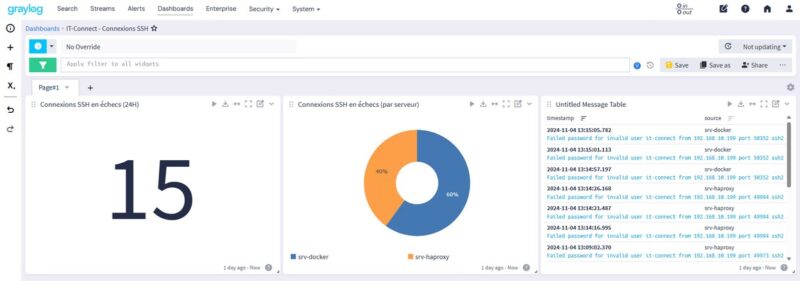
Welcome to the Graylog interface!

E. Graylog: create a new administrator account
Rather than using the admin account created natively by Graylog, you can create your own personal administrator account. Click on the "System" menu, then on "Users and Teams" and click on the "Create user" button. Then fill in the form and assign the administrator role to your account.
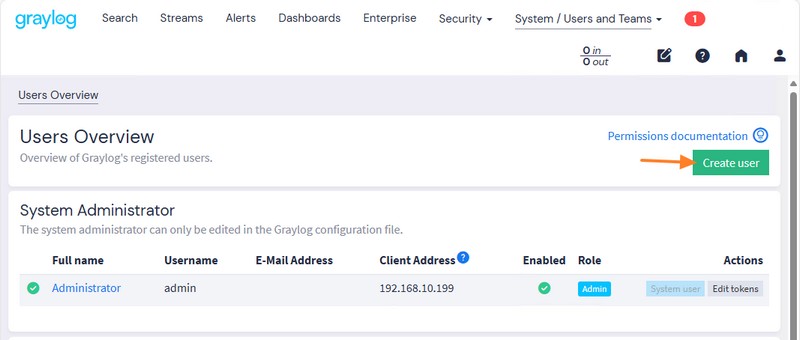
A personalized account can contain additional information, such as first and last name and e-mail address, unlike a native admin account. What's more, this ensures better traceability when each person works with a named account.
IV. Conclusion
Now we've learned how to install Graylog on a Debian 12 machine! Now you can store, index and analyze your logs from a single console!
Next, we'll look at how to send logs from Linux and Windows Server machines to our Graylog server: this is where it gets even more interesting! To do this, we'll need to declare new "Inputs" in Graylog (as well as Indexes and Streams) and configure the sending of logs to the servers. I'll also try to publish a tutorial on securing OpenSearch by activating the security module and configuring e-mail alerts via the notification function.
To find out more :