Installing PowerShell on Windows
Table of Contents
I. Introduction
In this chapter, we'll look at how to install the various versions of PowerShell on Windows operating systems, as well as the options available for updating PowerShell on machines.
As a reminder, Windows PowerShell is installed by default in Windows and Windows Server, so there's no need to install it manually. However, you may need to update it if you're using a version of Windows that doesn't come with Windows PowerShell 5.1.
The version of PowerShell available for Windows, Linux and macOS, i.e. version 6.0 and above, must be installed manually.
II. Upgrading to Windows PowerShell 5.1
If you're using a version of Windows or Windows Server prior to Windows 10 version 1607 (Anniversary Update) and Windows Server 2016, you won't have Windows PowerShell 5.1 by default.
By the way, you can view your version of PowerShell by executing the command below in a Windows PowerShell console :
$PSVersionTableThe result returned by this command highlights the PowerShell version installed ("PSVersion"). We can also see"PSEdition: Desktop", which refers to Windows PowerShell. It's important to make the distinction, as this command also works in a PowerShell console (and not Windows PowerShell), but the result will be different.
Here's an example:
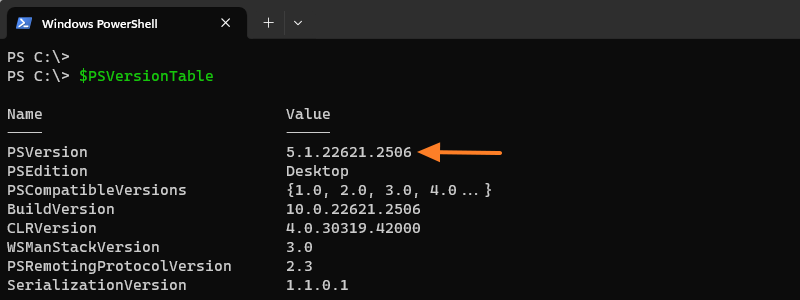
You may have just executed your first command in a PowerShell console! Please note that"$PSVersionTable" is an automatic variable managed by PowerShell, but we'll come back to this later.
If you need to update PowerShell to version 5.1, you need to install Windows Management Framework 5.1 on your machine. To do this, download and install the software by clicking on the link below:
III. Installing PowerShell 7 on Windows
To install the latest version of PowerShell 7 on a Windows machine, as well as future versions, you need to download the installation package onto your machine and perform the installation yourself. There are several options available:
- Download the installation package from GitHub and install it manually
- Installing from the Microsoft Store
- Installing from the WinGet command line
A. Manual PowerShell installation
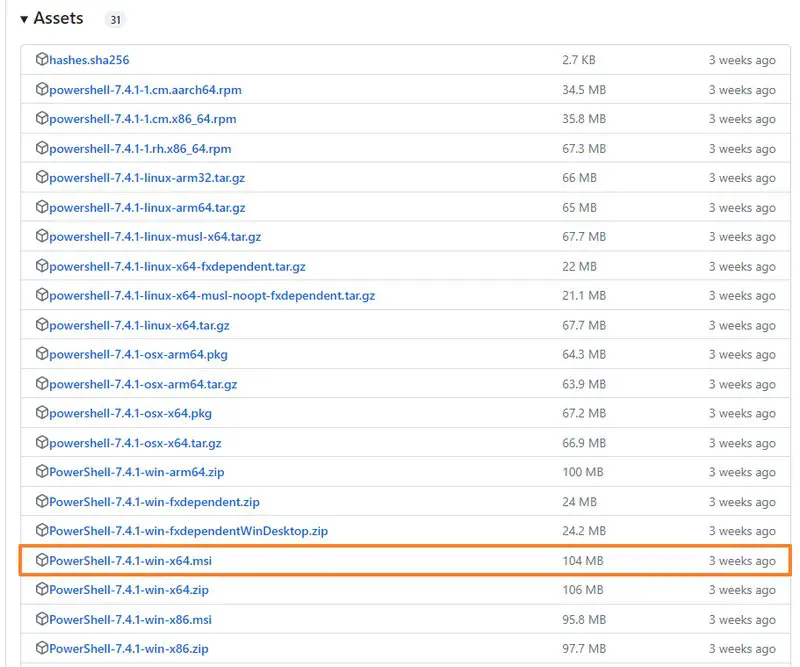
To download the PowerShell installation package from the Internet, using a browser, there's only one reliable address: the official PowerShell GitHub.
It can be accessed at the following address
When browsing this page, click on the"Assets" section under the PowerShell version you wish to download. This page references all the installation packages for Windows, Linux and macOS, offering several formats in each case. For example, there are MSI packages for Windows, as well as DEB and RPM packages for Linux.
For Windows, there are several versions, including 32-bit and 64-bit, so be sure to choose the version that matches your machine's architecture.
The alternative is to run the command below to download and run a PowerShell installation script. This is an official installation script provided by Microsoft.
iex "& { $(irm https://aka.ms/install-powershell.ps1) } -UseMSI"As shown in the image below, this script will download the PowerShell version corresponding to your machine and run it. Then follow the installation wizard.
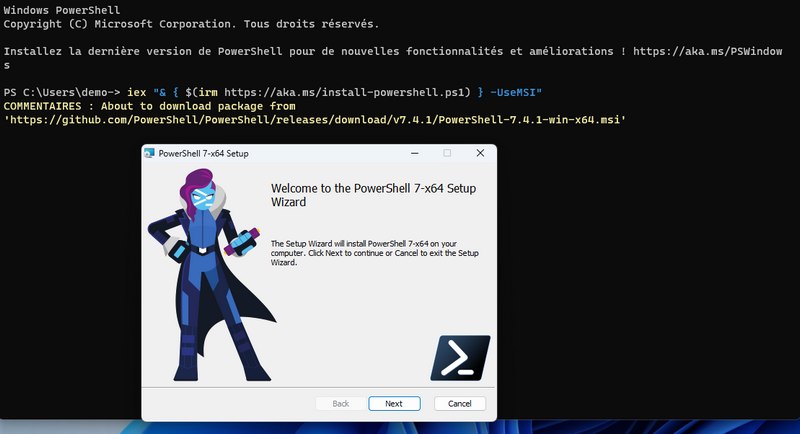
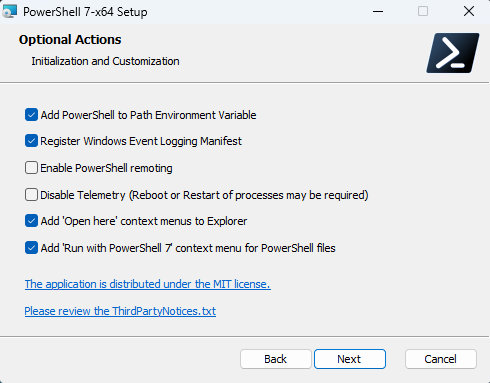
The wizard allows you to install PowerShell in just a few clicks. However, we still have a few options to configure.
- Add PowerShell to Path Environment Variable (enabled): adds the PowerShell installation path to the "PATH" environment variable, making it easy to call the PowerShell executable from the console (without specifying the installation directory).
- Register Windows Event Logging Manifest (enabled) : configures PowerShell to log events in the Windows Event Log.
- Enable PowerShell Remoting: when this option is enabled, remote management via PowerShell is activated on the local machine. This option doesn't have to be enabled - it depends on your needs.
- Disable Telemetry: when this option is enabled, telemetry data collection and transmission are disabled.
- Add 'Open here' context menus to Explorer: this provides a new entry in the Windows context menu, to open PowerShell directly in a specific location via a right-click (PowerShell opens and the prompt is positioned in the directory in question).
- Add 'Run with PowerShell 7' context menu for PowerShell files: this provides an option in the Windows context menu to run a script via PowerShell 7 by right-clicking on a script file.
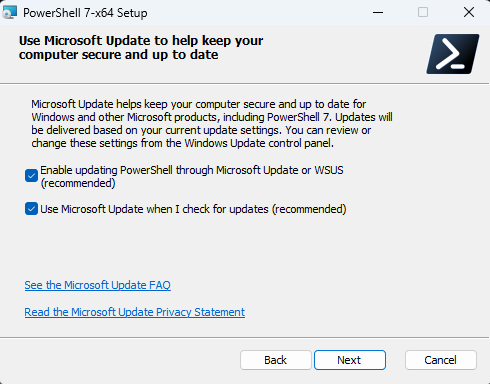
In the next step, further options are displayed. This time, PowerShell offers you the option of enabling automatic updates via Windows Update. This is interesting, because you'll be able to keep PowerShell up to date by relying on Windows Update, just as you would with Windows system updates. You can also deploy PowerShell updates via WSUS. This is a new feature introduced with PowerShell 7.2.
Then continue until you've finished installing PowerShell 7!
B. Installing PowerShell with WinGet
Another way to install PowerShell on your Windows 10 or Windows 11 machine is to use the WinGet package manager. In this case, run the following command:
winget install --id Microsoft.Powershell --source wingetThis is possible because WinGet is based on the Microsoft Store catalog and PowerShell is distributed via the Microsoft application store.
In the same way, you can update PowerShell via WinGet :
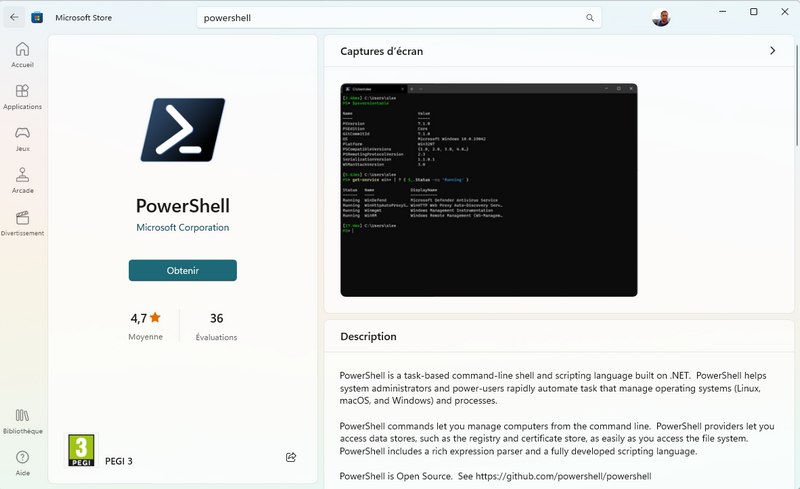
winget upgrade --id Microsoft.PowerShellC. Installing PowerShell with the Microsoft Store
From the Microsoft Store, simply search for"powershell" to find it in the list of available applications. Then click on the"Get" button.
The choice is yours. In the enterprise, you can automate PowerShell deployment on a set of machines using an Active Directory Group Policy (GPO) or an Intune policy: the MSI package makes this easy.