www.it-connect.fr

How to Export Data in CSV Format with PowerShell?
Table of Contents
I. Introduction
In this chapter, we will see how to export data in CSV format using PowerShell, with the “Export-CSV” command.
After seeing how to import data from a CSV file with PowerShell, this second chapter will discuss using the “Export-CSV” cmdlet to export objects to a CSV file with PowerShell.
For this example, we will see how to export the list of Windows services in CSV format, retrieving certain properties (technical name, display name, and service status).
II. Exporting Data to CSV with Export-CSV
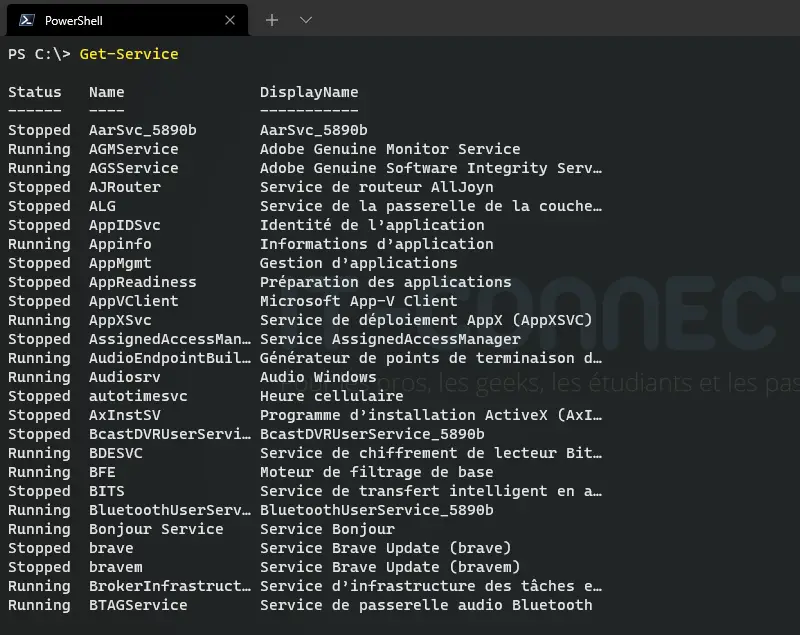
We will start by listing the services with a cmdlet you're familiar with, as we've used it several times:
Get-Service
Then, we will select the properties we want to export: Name, DisplayName, and Status.
Which gives:
Get-Service | Select-Object DisplayName, Name, Status
At this point, in the console, we have the output we'd like to have in the CSV: a list with three columns, thanks to the three selected properties. When the output in the console matches what you want to have in the CSV, all that's left is to export to CSV format.
Note: if we don't select properties with Select-Object, the CSV export will take all properties returned by Get-Service.
This export to CSV format is done with “Export-CSV” which we will specify after our command, behind the pipeline. We will specify two parameters:
- -Path: the path to the output CSV file
- -Delimiter: the character to use as a delimiter
Which gives:
Get-Service | Select-Object Name, DisplayName, Status | Export-CSV -Path “C:TEMPservices.csv” -Delimiter “;”
If we open the “services.csv” file, we can see that the first line is quite surprising:
#TYPE Selected.System.ServiceProcess.ServiceController
This provides information about the data type. However, it's not helpful for us, as the first line should correspond to our column headers... Fortunately, there's a parameter that allows us to remove this line: “-NoTypeInformation”.
Just add it and this line will be a distant memory!
Get-Service | Select-Object Name, DisplayName, Status | Export-CSV -Path “C:TEMPservices.csv” -Delimiter “;” -NoTypeInformation
Note: this line is integrated into the CSV file only when using Windows PowerShell. If you're using PowerShell Core (PowerShell 7+), this line won't appear and the option doesn't even exist. However, there is an option (-IncludeTypeInformation) that allows adding the information if needed.
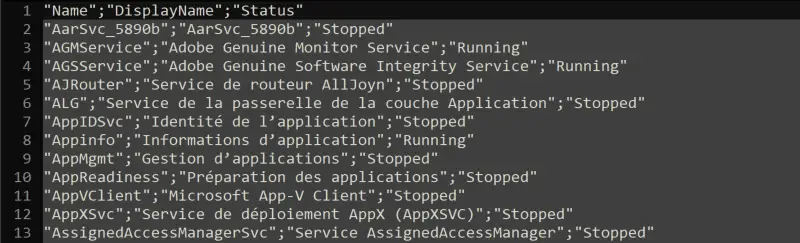
Finally, here's a preview of the obtained CSV file:
III. Tips for Using Export-CSV
To add content to an existing CSV file, we must specify the “-Append” parameter. Otherwise, the file will be overwritten each time, even if it already exists.
$ListeDesServices = Get-Service | Select-Object Name, DisplayName, Status
$ListeDesServices | Export-CSV -Path “C:TEMPservices.csv” -Delimiter “;” -Append
As when importing a CSV file, the “-Encoding” parameter is used to specify the encoding for our output file.
On newer versions of PowerShell, notably PowerShell Core 7, there's an option called “-UseQuotes” which allows specifying whether values should be enclosed in quotes or not. Useful if you have strings with spaces, but not particularly for numbers. This parameter can take several values: Always, AsNeeded, Never.
For example:
$ListeDesServices = Get-Service | Select-Object Name, DisplayName, Status
$ListeDesServices | Export-CSV -Path “C:TEMPservices.csv” -Delimiter “;” -UseQuotes Always
In a similar vein, the parameter “-QuoteFields” is used to specify the columns for which values should be enclosed in quotation marks. For example, here's the syntax to use to specify the “DisplayName” property:
$ListeDesServices = Get-Service | Select-Object Name, DisplayName, Status
$ListeDesServices | Export-CSV -Path “C:TEMPservices.csv” -Delimiter “;” -QuoteFields DisplayName
Finally, we will see how to modify the column names of our CSV file at the time of export. For this, we need to use the “Select-Object” cmdlet.
Instead of simply specifying “DisplayName” to select this property, we will create a calculated property to change the name (label). We will replace this code:
DisplayName
With this:
@{ expression={$_.DisplayName}; label=“NomAffichage” }
The column in our CSV will be named “NomAffichage”, which is nicer!
If we rename our three columns with a custom name, it gives:
Get-Service | Select-Object @{ expression={$_.Name}; label=“Nom” },@{ expression={$_.DisplayName}; label=“NomAffichage” },@{ expression={$_.Status}; label=“Statut” } | Export-CSV -Path “C:TEMPservices.csv” -Delimiter “;”
There you have it, the CSV file will be the same as before, except that our headers will have French names.
IV. Building a CSV File with Add-Content
To finish, we'll discuss another approach to create our own CSV file from scratch, without using “Export-CSV”. I've used this method before to generate a formatted log file with columns, or to create a report.
We could create an object, populate it gradually and export it to CSV format at the end, but we can also write directly to a file. It's that simple.
Let's start by creating the empty CSV file, then add our headers, which are our different fields:
New-Item -ItemType File -Path “C:TEMPLog.csv”
Using the “Add-Content” cmdlet, whose purpose is to add content to a file, we will add the first line corresponding to the headers: Date, Type, Message. This will be the basis of our log file.
Add-Content -Path “C:TEMPLog.csv” -Value “Date;Type;Message”
Then, when you need to add a log line to the file, you simply need to add content to the file respecting the three columns. In the example below, the Date
column will automatically take the current date and time as its value.
Add-Content -Path “C:TEMPLog.csv” -Value “$(Get-Date -Format yyyyMMdd_HHmm);Erreur;Here is the error detail!”
If we open the file with a text editor (or even with Excel, that's the point), we get:

Later, this CSV file can be imported using the Import-CSV cmdlet if we need to!