www.it-connect.fr
Apache Guacamole : your all-in-one remote access gateway for RDP, SSH, etc.
Table of Contents
I. Introduction
In this tutorial, we'll learn how to install and configure Apache Guacamole, a free, open-source solution that can be set up as an administration bastion, access gateway or bounce server. A Debian 12 machine will be used to host the application.
The Apache Guacamole server will be used as a single point of entry for accessing the infrastructure's servers and equipment, whether via the RDP, SSH, VNC and Telnet protocols, or even Kubernetes. Whether external or internal, connections to servers will necessarily pass through the Apache Guacamole host.
In the example below, the Apache Guacamole host is positioned in DMZ, since it must be accessible from the outside. Access from the outside is not mandatory, since a VPN connection to the corporate network could be imposed before allowing connection to the Guacamole interface. Similarly, to publish the Guacamole host on the Internet, it is recommended to use a reverse proxy on the front end (the firewall could very well perform this function), which would also allow flows to be passed in HTTPS.
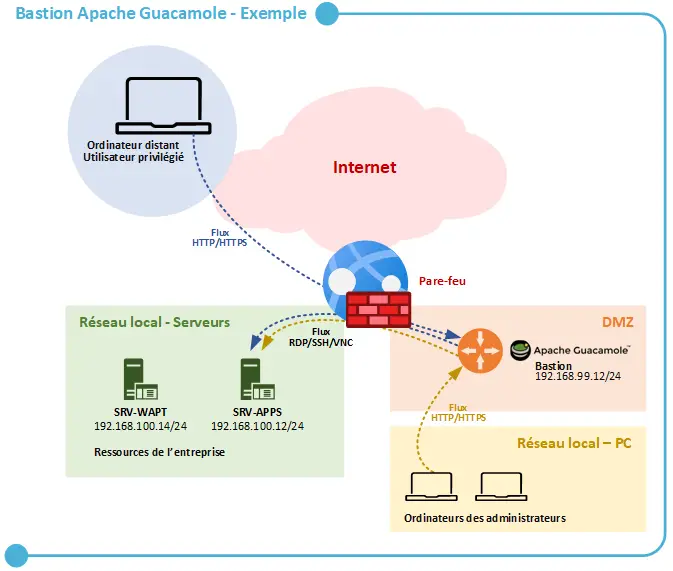
Apache Guacamole becomes a central element of the infrastructure, acting as a gateway to administer the machines. Rest assured, it is possible to have several Apache Guacamole hosts to distribute the load and ensure high availability.
Finally, firewall rules must also be adapted: the Apache Guacamole host must be the only one able to connect via RDP/SSH/VNC/Etc. to the machines in the infrastructure.
II. Key features of Apache Guacamole
Apache Guacamole integrates several attractive functions that will enable us to better monitor access to the servers in our infrastructure.
- Centralize and track connections: who, when, where, how long, from where
- No heavy client to install, as access is web-based thanks to HTML5
- Multi-factor authentication for login access, via TOTP code
- SSO authentication, compatible with SAML, OpenID Connect, CAS and LDAP
- Video recordings of sessions, i.e. when a connection is in use
- Authorization management for connection access, by group or by user
For those of you using Azure, Apache Guacamole represents an alternative to Azure Bastion. If you're interested in this subject, read this article:
III. Installing Apache Guacamole on Debian
A. Installing the Apache Guacamole prerequisites
First of all, we need to install a set of packages that are essential for Apache Guacamole to function properly. Some packages are specific to certain functions, such as RDP connections. This list of dependencies can be found in the documentation.
On the Debian machine, we start by installing these famous dependencies with the following command:
apt-get update
apt-get install build-essential libcairo2-dev libjpeg62-turbo-dev libpng-dev libtool-bin uuid-dev libossp-uuid-dev libavcodec-dev libavformat-dev libavutil-dev libswscale-dev freerdp2-dev libpango1.0-dev libssh2-1-dev libtelnet-dev libvncserver-dev libwebsockets-dev libpulse-dev libssl-dev libvorbis-dev libwebp-dev
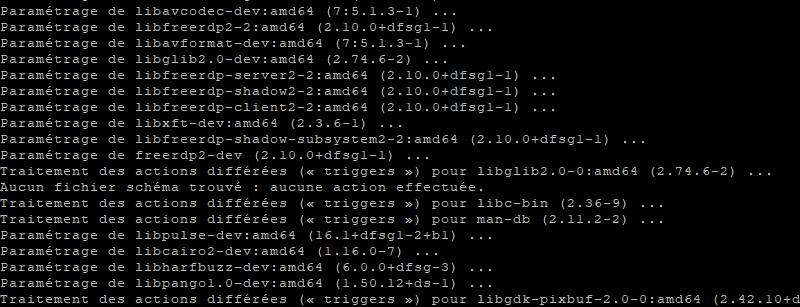
We wait quietly for the installation to finish.
The "client" part of Apache Guacamole requires the installation of a Tomcat server, but we'll do that later.
To install from a user account, without using the "root" account directly, install "sudo" and add a user to the corresponding group. The example below gives permissions to the user "flo":
apt-get install sudo
usermod -aG sudo flo
Then prefix any commands requiring elevation of privileges with "sudo".
sudo apt-get updateB. Compile and install Apache Guacamole Server
The "Server" part of Apache Guacamole must be downloaded and compiled locally to install. The latest version will be used, i.e. 1.5.2. To identify the latest version, you can follow these two links:
Go to the "/tmp" directory and download the tar.gz archive:
cd /tmp
wget https://downloads.apache.org/guacamole/1.5.5/source/guacamole-server-1.5.5.tar.gz
Later, when there's a new version of Apache Guacamole, you'll need to revisit the URL above (and others in the rest of this article).
Once the download is complete, unpack the tar.gz archive and move to the resulting directory:
tar -xzf guacamole-server-1.5.5.tar.gz
cd guacamole-server-1.5.5/
We run the command below to prepare for compilation, which will allow us to check for the presence of dependencies:
sudo ./configure --with-systemd-dir=/etc/systemd/system/
Before moving on, we check the output of this command. Normally, the main libraries we need are set to "yes". Like this:
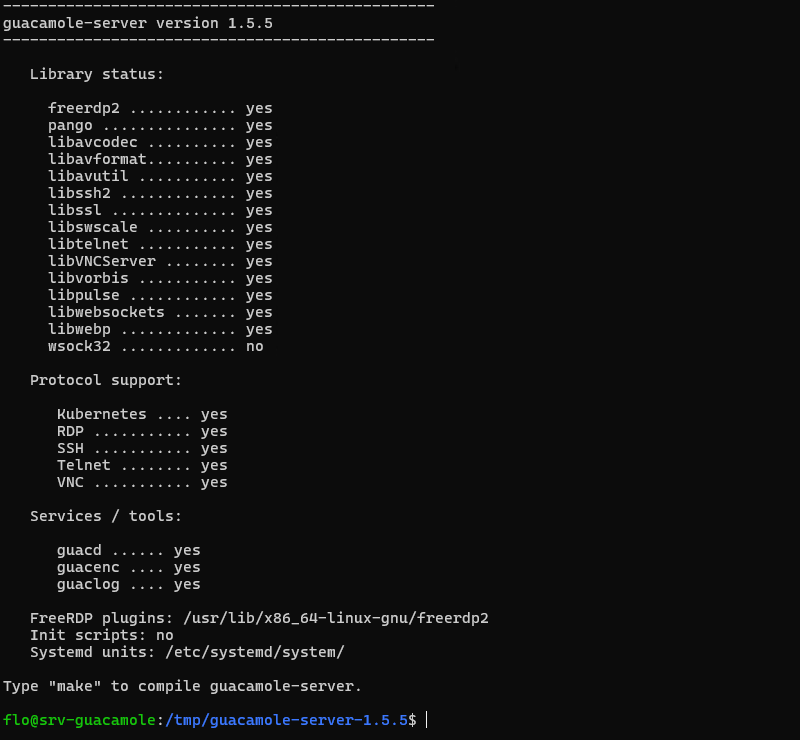
Look closely at the output of the previous command, to check for any errors. If you get an error specifying "guacenc_video_alloc", this is linked to the "guacenc" component used to create recordings in video format (linked to FFmpeg). In this case, you can run the previous command again, disabling this component:
sudo ./configure --with-systemd-dir=/etc/systemd/system/ --disable-guacencNext, compile the guacamole-server source code:
sudo make
Finally, we install the Guacamole Server component:
sudo make install
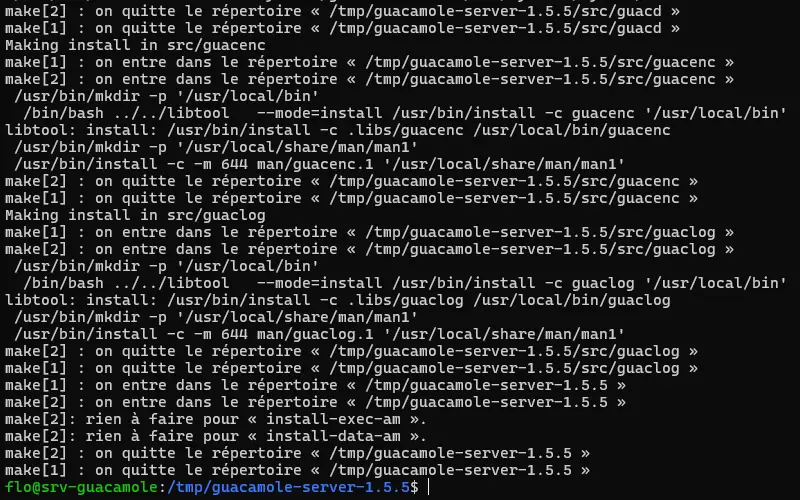
The server part of Apache Guacamole is now installed!
But there are other steps to take...
The command below is used to update the links between guacamole-server and the libraries (this command does not return any results):
sudo ldconfig
Next, we'll start the "guacd" service corresponding to Guacamole and enable its automatic startup. The first command is used to register the new service.
sudo systemctl daemon-reload
sudo systemctl enable --now guacd
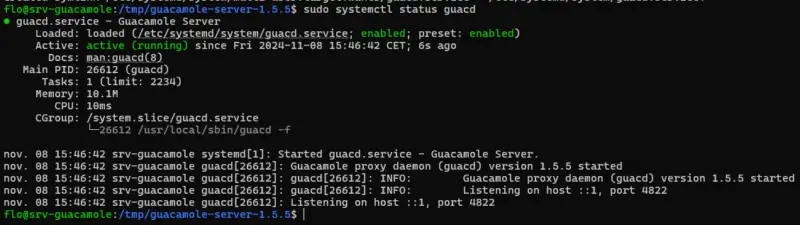
Finally, we check the status of Apache Guacamole Server :
sudo systemctl status guacd
C. Create configuration directory
The last step before moving on to the client side of Apache Guacamole is to create the Apache Guacamole configuration tree. This will give us the "/etc/guacamole" directory, with the "extensions" and "lib" sub-directories. We'll need these later to set up data storage in a MariaDB / MySQL database.
sudo mkdir -p /etc/guacamole/{extensions,lib}
D. Install Guacamole Client (Web App)
For the Web App corresponding to Apache Guacamole, and therefore the client part, we need a Tomcat 9 server. I must stress that Tomcat 10, distributed by default via the Debian 12 repositories, is not supported by Apache Guacamole. We need to add the Debian 11 repository to our Debian 12 machine in order to be able to download the corresponding packages for Tomcat 9.
We're going to add a new source file for Apt. Create the following file:
sudo nano /etc/apt/sources.list.d/bullseye.list Add this line, save and close the file.
deb http://deb.debian.org/debian/ bullseye mainUpdate the package cache :
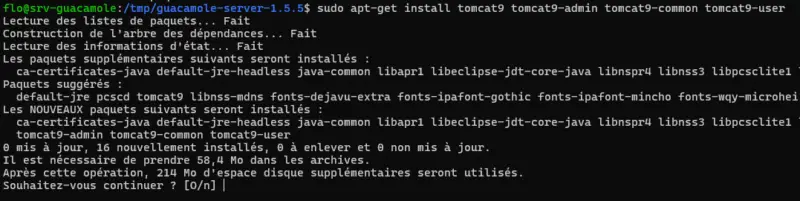
sudo apt-get updateInstall the Tomcat 9 packages on Debian 12 with this command:
sudo apt-get install tomcat9 tomcat9-admin tomcat9-common tomcat9-user
Next, we're going to download the latest version of the Apache Guacamole Web App from the official repository (same place as for the server part). We position ourselves in "/tmp" and download the Web App, which amounts to downloading a file with the ".war" extension. Here, version 1.5.5 is downloaded.
cd /tmp
wget https://downloads.apache.org/guacamole/1.5.5/binary/guacamole-1.5.5.war
Once the file is downloaded, we move it to Tomcat9's Web App library with this command :
sudo mv guacamole-1.5.5.war /var/lib/tomcat9/webapps/guacamole.war
We then restart the Tomcat9 and Guacamole services:
sudo systemctl restart tomcat9 guacd
Apache Guacamole Client is now installed!
E. MariaDB database for authentication
This last step before starting to use Apache Guacamole consists in deploying MariaDB Server (or MySQL Server, as you prefer) on Debian, so that Apache Guacamole relies on a database. This database will be used to store all application information.
We start by installing the MariaDB Server package:
sudo apt-get install mariadb-server
Then we run the script below to secure our instance (change root password, disable anonymous access, etc.).
sudo mysql_secure_installation
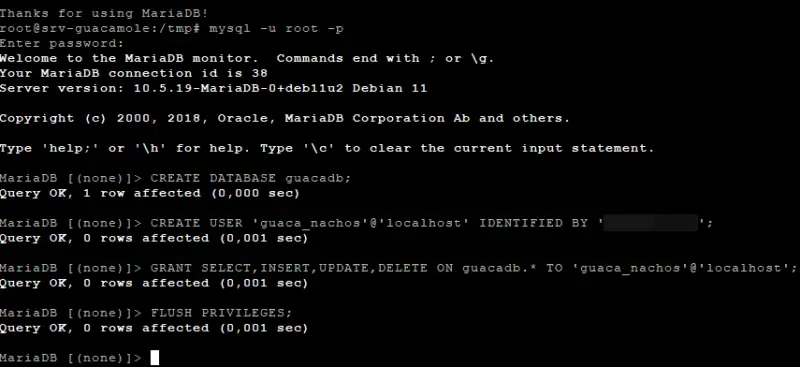
Once this step has been completed, we will connect as root to our MariaDB instance:
mysql -u root -p
This is useful for creating a database and a dedicated user for Apache Guacamole. The commands below create the "guacadb" database, with the user "guaca_nachos" and the password "P@ssword!" (adapt these values). This user has some rights to the database.
CREATE DATABASE guacadb;
CREATE USER'guaca_nachos'@'localhost' IDENTIFIED BY'P@ssword!';
GRANT SELECT,INSERT,UPDATE,DELETE ON guacadb.* TO'guaca_nachos'@'localhost';
FLUSH PRIVILEGES;
EXIT;
The next step is to add the MySQL extension to Apache Guacamole, along with the corresponding connector. A few more files to download from the Internet.
cd /tmp
wget https://downloads.apache.org/guacamole/1.5.5/binary/guacamole-auth-jdbc-1.5.5.tar.gz
Then unpack the resulting tar.gz archive:
tar -xzf guacamole-auth-jdbc-1.5.5.tar.gz
Move the extension ".jar" file to the"/etc/guacamole/extensions/" directory created earlier:
sudo mv guacamole-auth-jdbc-1.5.5/mysql/guacamole-auth-jdbc-mysql-1.5.5.jar /etc/guacamole/extensions/
Next, download the MySQL connector from the MySQL website (whether you're using MariaDB or MySQL).
Use the link below to locate the link to the latest version by choosing "Platform Independent", then clicking on the "Download" button to obtain the "Compressed TAR Archive".
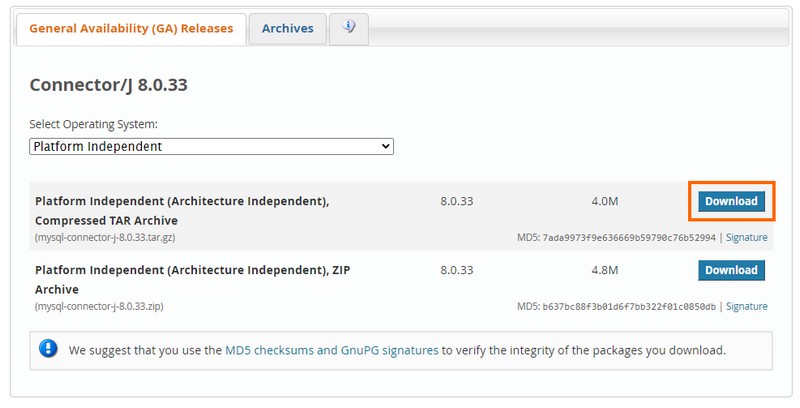
Another page loads, copy the link under "No thanks, just start my download.". For the current version, 8.0.33, the link is included in the order below.
Start the download:
cd /tmp
wget https://dev.mysql.com/get/Downloads/Connector-J/mysql-connector-j-9.1.0.tar.gz
Then unpack the tar.gz archive:
tar -xzf mysql-connector-j-9.1.0.tar.gz
Copy (or move) the connector's .jar file to Apache Guacamole's "lib" directory:
sudo cp mysql-connector-j-9.1.0/mysql-connector-j-9.1.0.jar /etc/guacamole/lib/
The dependencies are deployed, but we haven't yet finished integrating with MariaDB.
We need to import the structure of the Apache Guacamole database into our "guacadb" database. To do this, we'll import all the SQL files located in the "guacamole-auth-jdbc-1.5.5/mysql/schema/" directory. The MariaDB root password must be entered to perform the import.
cd guacamole-auth-jdbc-1.5.5/mysql/schema/
cat *.sql | mysql -u root -p guacadb

Once this is done, we'll create and edit the "guacamole.properties" file to declare the connection to MariaDB. This file can be used for other parameters as required.
sudo nano /etc/guacamole/guacamole.properties
In this file, insert the lines below, adapting the last three lines with your values:
# MySQL
mysql-hostname: 127.0.0.1
mysql-port: 3306
mysql-database: guacadb
mysql-username: guaca_nachos
mysql-password: P@ssword!
Save and close the file.
While we're in configuration, edit the "guacd.conf" file to declare the Guacamole server (here, we're declaring a local connection on the default port, i.e. 4822).
sudo nano /etc/guacamole/guacd.conf
Here is the code to integrate:
[server]
bind_host = 0.0.0.0
bind_port = 4822
We save and finish by restarting the three services linked to Apache Guacamole:
sudo systemctl restart tomcat9 guacd mariadb
The basic installation is now complete!
IV. Getting started with Apache Guacamole
We can now connect to Apache Guacamole to take our first steps on the Web App interface.
http://:8080/guacamole/
A login page will appear:
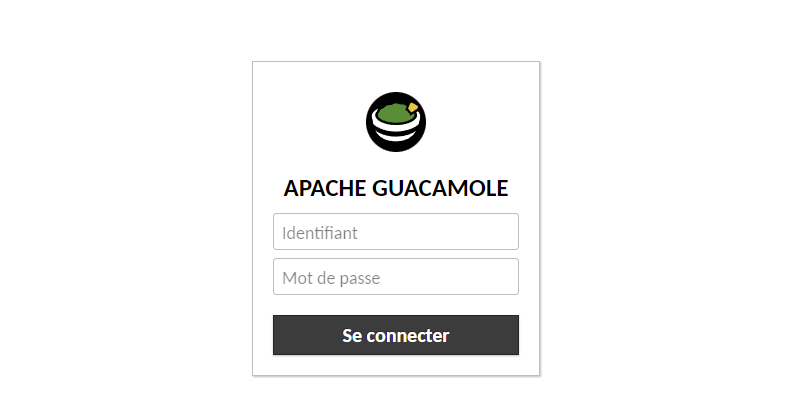
To connect, we'll use the default logins:
- User: guacadmin
- Password: guacadmin
Welcome to Apache Guacamole! Even if it's empty at the moment... A little more courage!
A. Create a new admin account
First, we'll create a new administration account and delete the default one, for security reasons.
Our objective is as follows:
- Create a new administrator account (with a personalized name)
- Logout from "guacadmin" account
- Reconnect with the new administrator account
- Delete the default "guacadmin" account (or at least change its password and disable it)
To access the settings, click on the user name in the top right-hand corner, then on "Settings".
Then go to the "Users" tab and click on "New user".
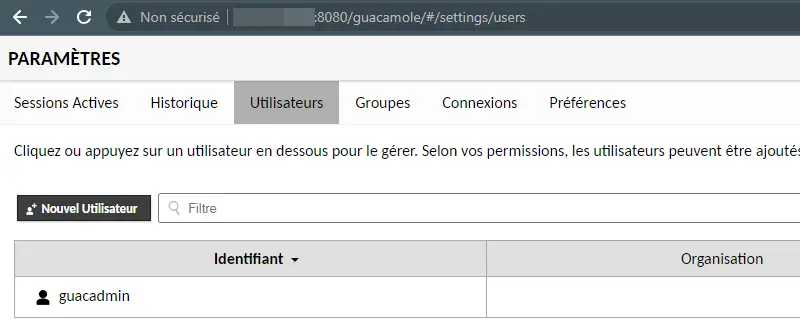
A form appears. Enter a user name, avoiding the traditional "Administrator", "Admin", etc.... And choose a strong password. Check all permissions for this user to be administrator of the Guacamole platform.
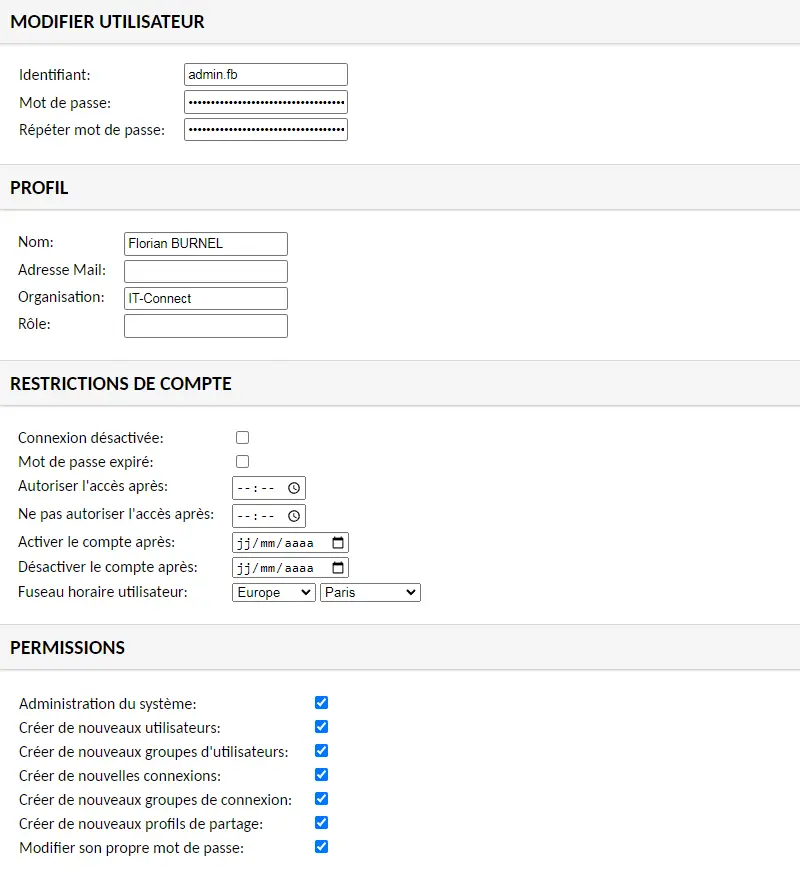
Although this doesn't apply to our current user, there are some interesting options in the "Account restrictions" section. You can restrict access to sessions to certain time slots, or activate and deactivate the account at a specific date. This is a great way of granting access to a service provider while retaining control over sessions.
This new account is created, so follow the steps outlined above to get rid of the guacadmin account. You'll find everything in Settings, then in the "Users" section.
Note: Apache Guacamole also lets you create groups to facilitate authorization management.
B. Add an RDP connection
We're going to create our first connection in Apache Guacamole, in order to connect to a server using RDP! To create a connection using another protocol, such as SSH, the principle remains the same.
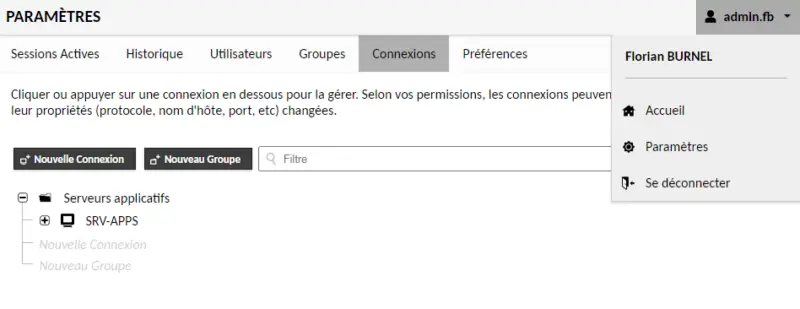
To create a new connection: Settings > Connection > New connection
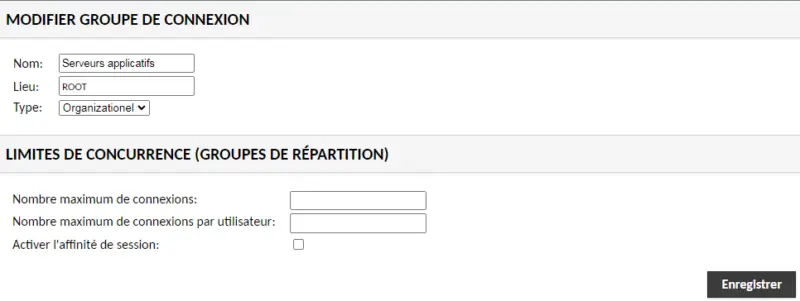
But first, let's create a new group, as these groups are used to organize connections: Settings > Connection > New group
In this example, I create a group called "Application servers". It will be positioned under the "ROOT" location, which is the root of the tree structure. The "Organizationel" group type must be selected for all groups whose purpose is to organize connections.
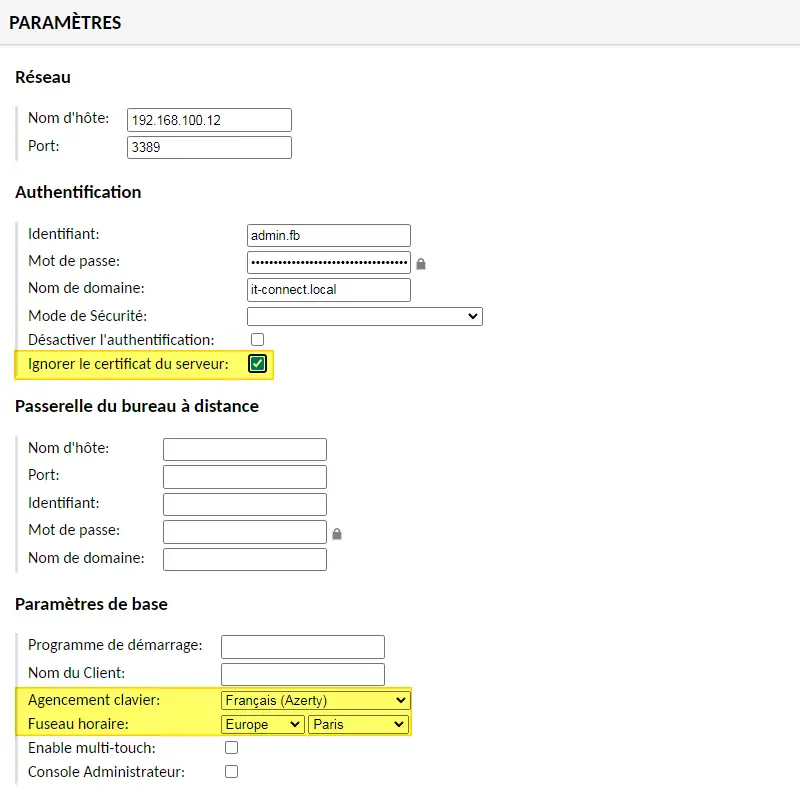
Save and click on the "New connection" button. Start by naming the connection, choosing the group and protocol. Here, I want to connect to the "SRV-APPS" server, associated with the IP address "192.168.100.12".

Next, there is a set of parameters to fill in:
- Host name: the server's DNS name (if the Apache Guacamole server is able to resolve the name), otherwise the IP address
- Port: RDP port number, default 3389 (no need to specify if this is the default port)
- Identifier: account with which to authenticate on the server
- Password: password for the account specified above
- Domain name: Active Directory domain name, if required
- Security mode: default is automatic detection (you can also select NLA)
- Ignore server certificate: check this option if you have not deployed a certificate for your RDP connections and are using an IP address for the connection.
- Keyboard layout: choose"French (Azerty)", or adapt to your configuration
- Time zone: choose"Europe / Paris", or adapt to your configuration
There are many options available, including bringing up local devices, or going through a remote desktop gateway. Initially, you'll need to spend some time finding the right formula to ensure that the RDP connection incorporates all the functions you need. However, if you simply want to connect and have remote control, there's no need to make major changes to the configuration.
To make the experience a little more pleasant, you can check the options below (but this is optional - test with and without):

Save. The new connection appears under "Application servers". To test this connection, switch to "Home" by clicking on your login in the top right-hand corner.
In the home page, users can view all the connections they are authorized to use.
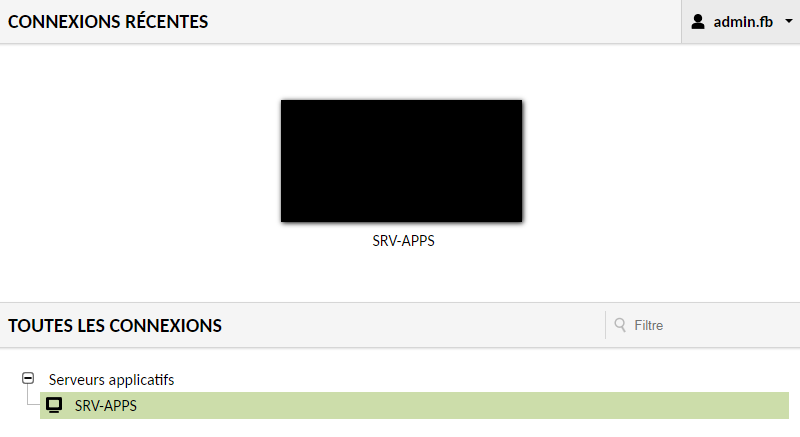
Just click on the server and the connection will be launched...
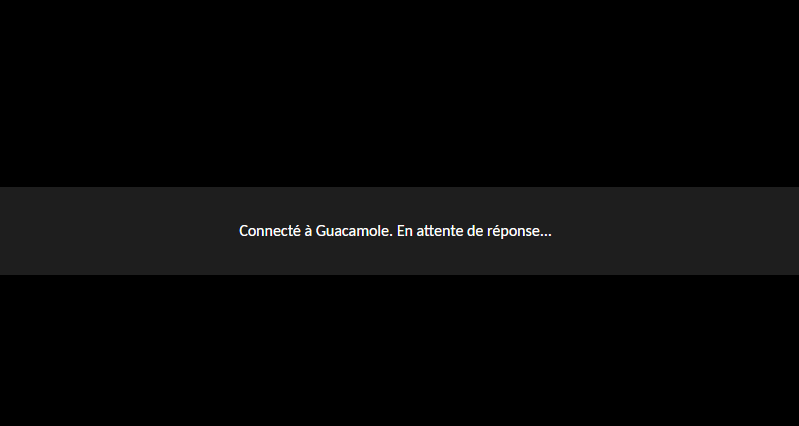
Now I'm connected to the Remote Desktop via the RDP protocol through my Apache Guacamole server! If this doesn't work, read the next part of this article. Here's an example of an RDP connection via Guacamole, on a machine running Windows Server 2025.
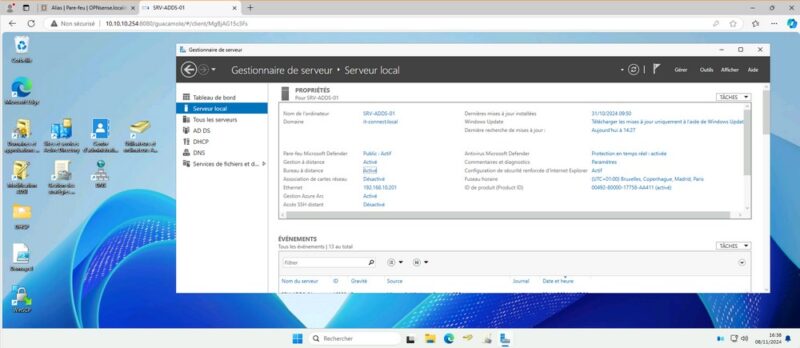
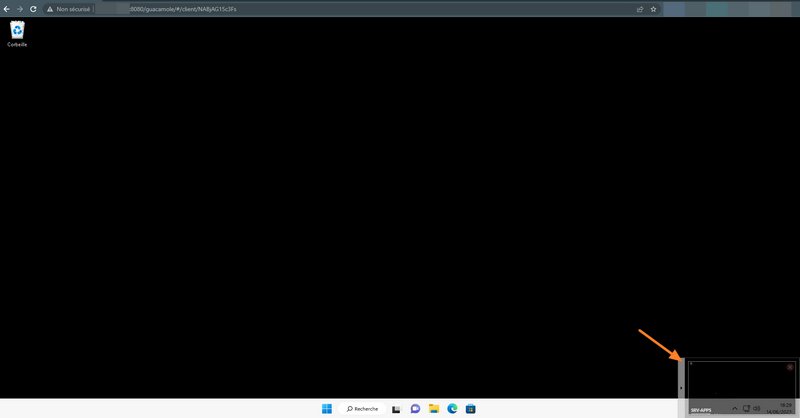
The keyboard shortcut CTRL + ALT + SHIFT gives access to the clipboard and other options for managing the remote connection. By the way, while you're here, if you click on the username and "Home", the session remains active, but it shrinks to the bottom right of the screen.
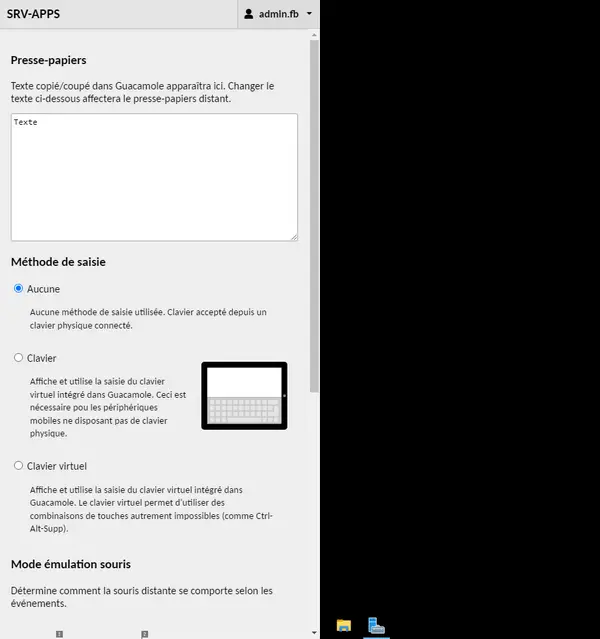
This will also make it possible toopen several connections at the same time and switch from one to another.
C. Apache Guacamole: RDP connection error
What should I do if the RDP connection fails to launch or displays an error?
Go back to your server's command line and check the last log lines displayed when looking at the status of the guacd service:
sudo systemctl status guacd
For example, we can find this :
june 14 20:15:29 srv-guacamole guacd[31120]: Certificate validation failed
june 14 20:15:29 srv-guacamole guacd[31120]: RDP server closed/refused connection: SSL/TLS connection failed (untrusted/self-signed certificate?)
If the RDP certificate cannot be verified (e.g. self-signed) and the "Ignore server certificate" option is not checked in the Guacamole connection settings, then this error will occur.
Another error you may encounter if you need to establish RDP connections is this:
RDP server closed/refused connection: Security negotiation failed (wrong security type?)
This problem is linked to the "daemon" user account used by default to run the "guacd" service. You can check it with this command :
sudo ps aux | grep -v grep| grep guacd
# Résultat :
daemon     31513  0.0  0.7 247928 15400 ?        Ss   16:03   0:00 /usr/local/sbin/guacd -f
We need to create a new user, assign him the necessary permissions on Apache Guacamole data, then update the service and finally restart it.
Here is the series of commands to execute, in order:
sudo useradd -M -d /var/lib/guacd/ -r -s /sbin/nologin -c "Guacd User" guacd
sudo mkdir /var/lib/guacd
sudo chown -R guacd: /var/lib/guacd
sudo sed -i 's/daemon/guacd/' /etc/systemd/system/guacd.service
sudo systemctl daemon-reload
sudo systemctl restart guacd
Then check the service status:
sudo systemctl status guacd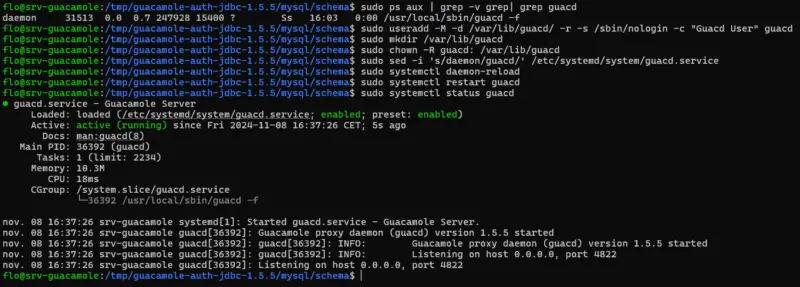
If it's OK, you can try a new RDP connection.
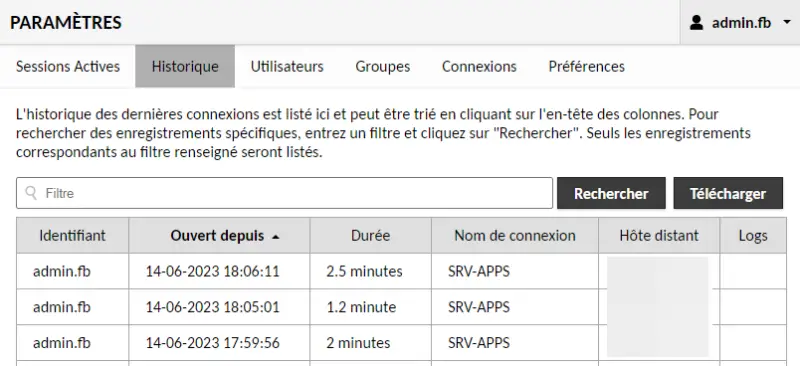
C. Connection history
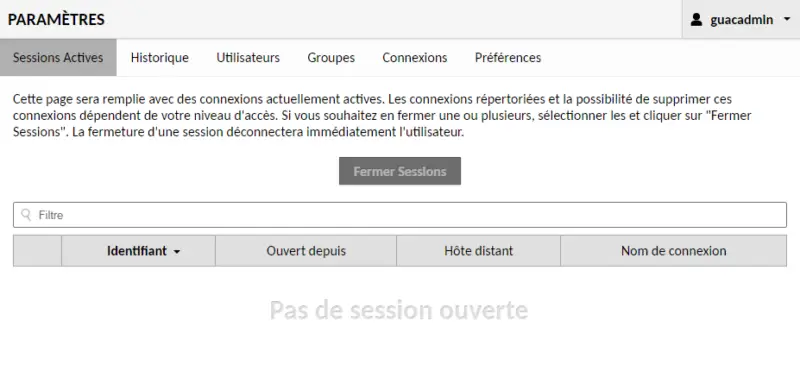
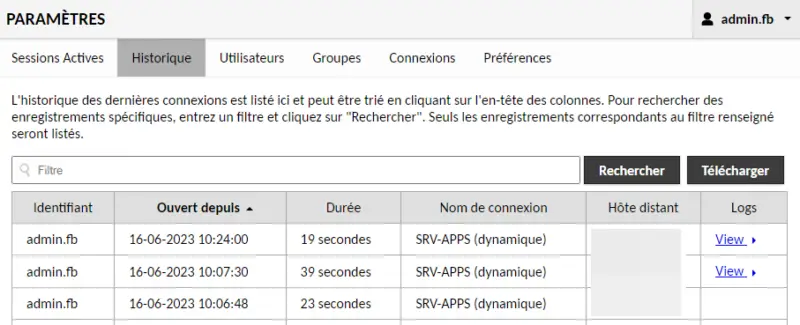
In the settings, the "History" section lets you view all connections made by all Guacamole users!
We can find out which Guacamole user used which session, when, for how long and from which source IP address.
Note: the"Active sessions" section can be used as a "kill switch" to close one or more current sessions.
V. Improving your Apache Guacamole installation
A. Set up TOTP dual authentication
To benefit from double authentication with a TOTP code as a second factor, an extension must be added to Apache Guacamole. So, when a user connects to Apache Guacamole, he or she must configure this second authentication factor via an application such as Microsoft Authenticator, Google Authenticator, FreeOTP, etc... Please note that this applies when authenticating to Guacamole, not when using a connection (and must therefore be validated once).
Since Guacamole provides access to the company's servers, I think it's essential to set up the MFA.
Again from the official Apache Guacamole repository, we retrieve the "guacamole-auth-totp" extension. Download the file to /tmp:
cd /tmp
wget https://downloads.apache.org/guacamole/1.5.5/binary/guacamole-auth-totp-1.5.5.tar.gz
Unpack the :
tar -xzf guacamole-auth-totp-1.5.5.tar.gz
Then move the extension ".jar" file to the Guacamole "extensions" directory:
sudo mv guacamole-auth-totp-1.5.5/guacamole-auth-totp-1.5.5.jar /etc/guacamole/extensions/
Now we need to configure the extension from the "guacamole.properties" file, which we're going to edit without further ado:
sudo nano /etc/guacamole/guacamole.properties
In this file, there are 4 parameters that can be declared to configure the TOTP extension. Although they are not mandatory, they allow you to customize your deployment. They are explained in the official documentation:
In the file, we will declare 4 parameters:
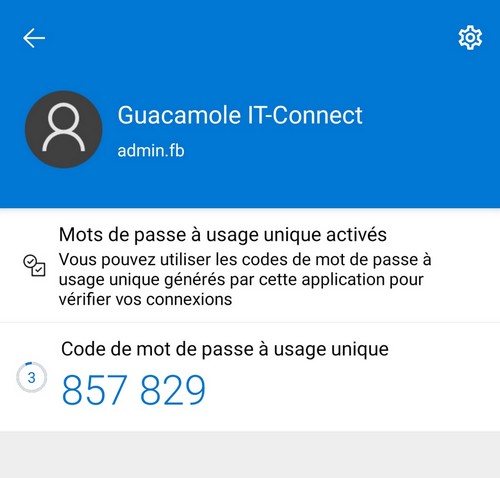
- totp-issuer: the name by which Apache Guacamole will appear in your TOTP application.
- totp-digits: number of digits for single-use code - between 6 and 8, default is 6.
- totp-period: length of time each code is valid, default 30.
- totp-mode: hash algorithm used, between sha1, sha256 and sha512 - default is sha1.
This gives the following configuration (if you switch to SHA256, it won't work with Microsoft Authenticator):
# TOTP
totp-issuer: Guacamole IT-Connect
totp-digits: 6
totp-period: 30
totp-mode: sha1
We save, close the file and finish by restarting Tomcat to apply the changes:
sudo systemctl restart tomcat9
The rest takes place on the Web interface.
Log back in with your account, and you'll be prompted to configure the MFA!
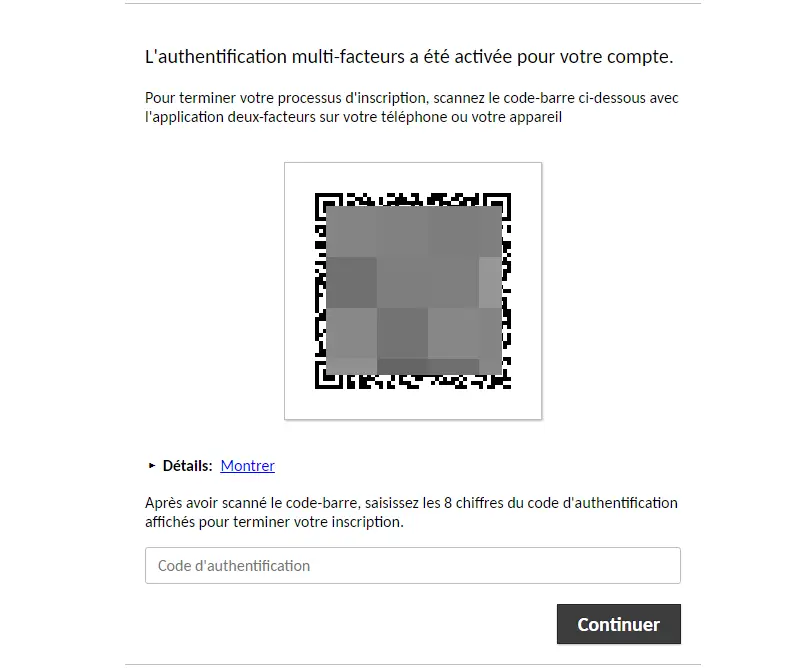
That's when you need to pull out your mobile app, scan the QR code and finalize the MFA configuration on your Guacamole account.
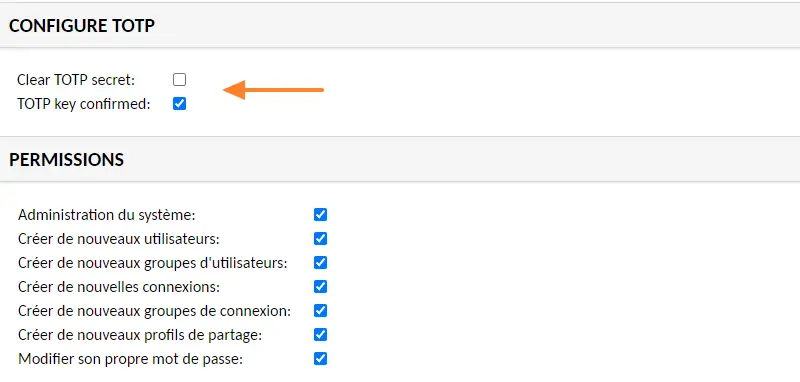
From now on, a TOTP code will have to be specified for each new connection to Guacamole. In each user's settings, there is a "Configure TOTP" section that shows the status of the MFA on the account, with the option of resetting the TOTP secret on the account in question.
Two-factor authentication is now up and running on the Guacamole server!
B. Create a video recording of sessions
Apache Guacamole is able to create a video recording for each session, with the option of enabling this only on certain connections. This video recording makes it possible to know exactly who did what, as the session is replayed.
This function is based on the "guacamole-history-recording-storage" extension, which is installed in the same way as the other extensions. The following procedure follows the advice given in the official documentation.
We start by downloading the Apache Guacamole tar.gz archive:
cd /tmp
wget https://downloads.apache.org/guacamole/1.5.2/binary/guacamole-history-recording-storage-1.5.5.tar.gz
Then unpack the tar.gz archive:
tar -xzf guacamole-history-recording-storage-1.5.5.tar.gz
We move the extension .jar file to Guacamole's "extensions" directory:
sudo mv guacamole-history-recording-storage-1.5.5/guacamole-history-recording-storage-1.5.5.jar /etc/guacamole/extensions/
We finish by restarting the Tomcat9 service to relaunch the Web App and load the new extension.
sudo systemctl restart tomcat9
The extension is integrated into Apache Guacamole.
Next, we need to configure the storage space. Here, it will be a folder on our server, but it should be possible to use a remote storage space that we mount locally on the server. We start by creating the folder in which the recordings will be stored:
sudo mkdir -p /var/lib/guacamole/recordings
Next, we define the permissions on this directory:
sudo chown root:tomcat /var/lib/guacamole/recordings
sudo chmod 2750 /var/lib/guacamole/recordings
Here, we set the owner user to "root", as the "guacd" service runs with this user by default. As for the owner group, it's "tomcat", so that our Tomcat9 server is able to play back the video recordings.
Now all that's left to do is configure video recording over a connection from Guacamole's web interface.
We're going to edit an existing connection and look at the "Screen recording" section. There are three parameters to configure:
- Registration path:
{HISTORY_PATH}/${HISTORY_UUID}
Each record will be stored in a subfolder of "/var/lib/guacamole/recordings", which will have a session UUID as its name. Thanks to the previously installed extension, Apache Guacamole is able to map sessions and recordings in order to offer reading from the Web. This mapping is performed using the name of the directory that includes the UUID. The alternative is to use "${HISTORY_UUID}" as the record name to perform the mapping.
- Recording name:
${GUAC_DATE}-${GUAC_TIME} - RDP - ${GUAC_USERNAME}
This will allow you to name the record with the date, time, "RDP" and the user who connected.
- Automatically create a registration path:
Check, to create the directory with the UUID name.
Which gives:

Save the configuration and connect to the server in question to create a record... Close the session... Return to Guacamole.
Within Settings, we go to "History". Here we can see that the "Logs" column includes a "View" button when a record is available.
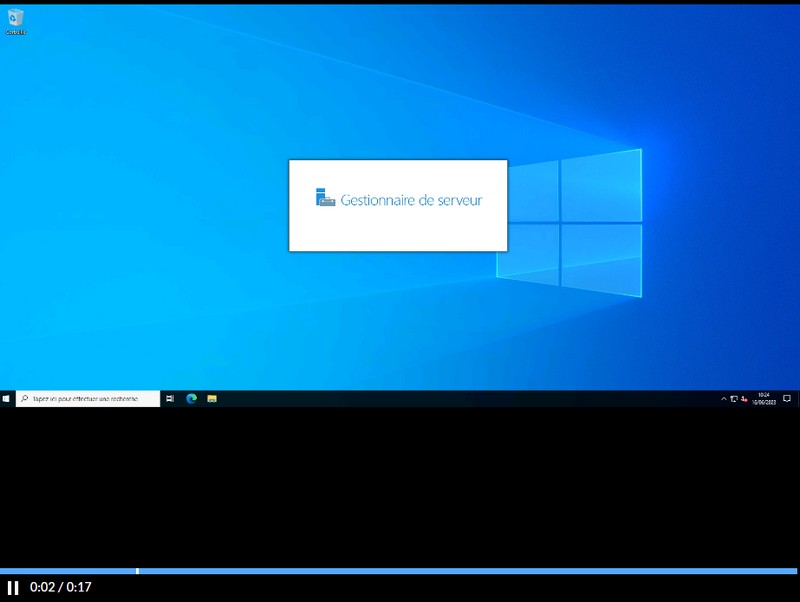
We click on "View" and there, it's magic, we can visualize the replay of our session!
If you wish to export a record, you must first convert it to the command line format. The basic format is not directly readable.
Apache Guacamole includes a special "guacenc" tool for creating video files in M4V format. To convert a recording into an HD-quality output file, use this command:
sudo guacenc -s <resolution> -f <file to convert>
 sudo guacenc -s 1280x720 -f "/var/lib/guacamole/recordings/fdf244e0-cdd9-3fa7-ab2d-03773b22ba5c/20230616-100730 - RDP - admin.fb"

Then all we have to do is transfer the video file to our PC, via SFTP for example, and play it back with a video player. Windows' built-in player can play the video file, or you can use VLC.
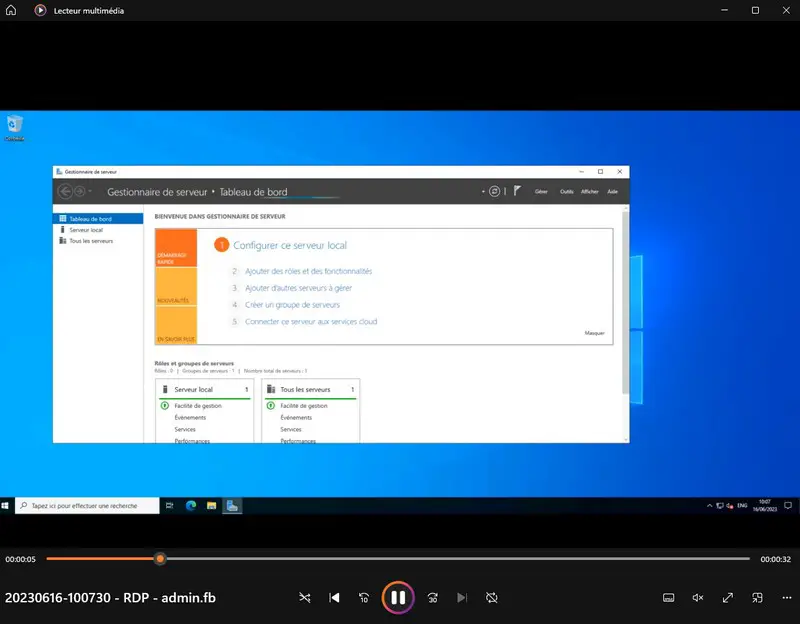
Guacamole Replay evenings are yours!
C. Multiple users on the same server
As we've seen in this example, when you create a connection, you specify the user name, password and domain. This means that for the same machine, you can have several connections for different users.
Let's be honest, this can quickly become unmanageable if there are a lot of servers and several people in the IT department... The good news is that there is another way.
First of all, we can use two variables to replace the user name and password with those of the user's Guacamole account. To do this, we use these two variables:
{GUAC_USERNAME}
{GUAC_PASSWORD}
In concrete terms, the "Authentication" part of the connection will be configured as follows:
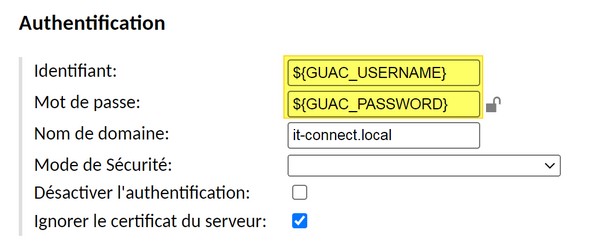
For this to work, the credentials must be identical between the Guacamole account and the account accepted by the remote host. For this to be really effective, LDAP (Active Directory) authentication should be implemented for SSO.
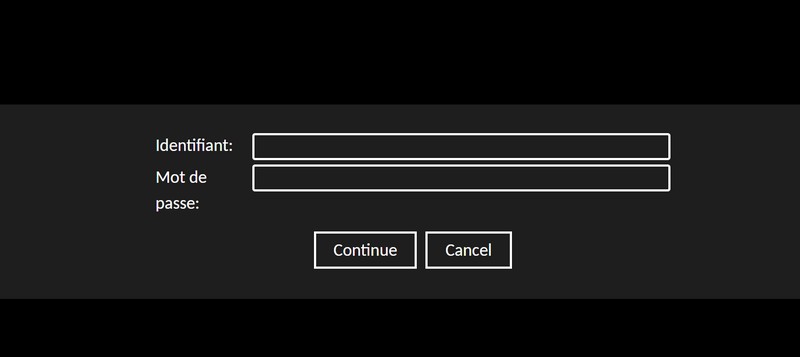
The other option is simple: you can also leave the "Username" and "Password" fields blank, while leaving the domain. In this case, the information will be entered when you log in. You could also enter the username, but not the password... It's quite flexible, really.
VI. Conclusion
After reading this tutorial, you'll be able to set up Apache Guacamole as a bastion for administering your Windows, Linux and other machines! With MFA and session recording as a bonus. All that's left is to get to grips with the tool, to declare users, create groups and so on.
If the community is interested in this topic, I'll try to propose an article with the addition of a reverse proxy to publish Apache Guacamole in HTTPS, with a valid certificate.
To complement this tutorial, here is a link to the official documentation: