Active Directory : using gMSA (group Managed Service Accounts)
Table of Contents
I. Introduction
In this tutorial, we'll look at how to prepare your infrastructure for the use of gMSA service accounts, as well as the use and management of gMSA accounts on Windows Server servers.
Windows Server 2008 introduced MSAs (Managed Services Accounts), also known as sMSAs(standalone Managed Service Accounts), while Windows Server 2012 included gMSAs (group Managed Service Accounts), an enhanced version of MSAs.
What you need to know about gMSA :
- The same gMSA can be used on several servers
- gMSAs are stored in the"Managed Service Account" container in the Active Directory
- A gMSA can only be used on Windows Server 2012 and later.
- Requires Microsoft Key Distribution Service(kdssvc.dll) for automatic password management and account creation
- a gMSA is similar to a security group, with computer objects authorized to use this secure service account.
- The functional level of your Active Directory forest must be at least Windows Server 2012.
- The password is managed by the Active Directory, is very, very complex and nobody knows it.
With an MSA or gMSA account, the password is automatically managed by the Active Directory itself, unlike a conventional user account, which can be used for a service but for which you have to manage password renewal yourself. In many cases, as this is both time-consuming and burdensome, the passwords for these accounts are not renewed by the administrators. That's why it's a good idea to use the gMSA solution, which also offers enhanced credential security.
An MSA account can be associated with just one server, unlike gMSA, which is restrictive when you need to use a service account on a service that is redundant between several servers.
In terms of compatibility, gMSA accounts work with different types of applications and features, including :
- Windows services
- Scheduled tasks
- IIS servers (Application Pool), SQL Server, ADFS, etc.
II. Prerequisites - generating a KDS root key
To be able to create gMSA accounts on our Active Directory infrastructure, the Key Distribution Service must be running and a root key generated. To create a key from the domain controller, we'll use PowerShell and the Add-KdsRootKey cmdlet.
It is possible to defer activation of the generated key by using the -EffectiveTime parameter followed by a date. If the -EffectiveImmediately parameter is used, the key will be usable 10 hours after its creation (default behavior), to ensure that it is replicated between different DCs.
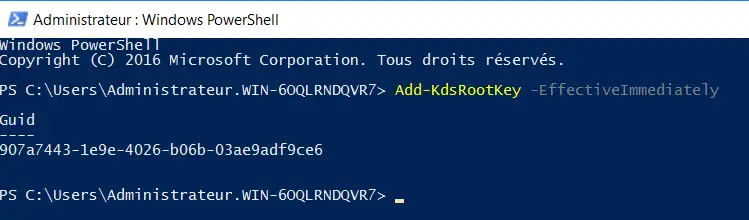
Here is the command to execute:
Add-KdsRootKey -EffectiveImmediately
As part of a lab, if you want to be able to use the KDS key now without having to wait 10 hours, it is possible to cheat using this command:
Add-KdsRootKey -EffectiveTime ((Get-Date).AddHours(-10))
The key created is identified by a Guid.
The key can be displayed simply by executing the command below:
Get-KdsRootKey
This returns a result in the form :
AttributeOfWrongFormat :
KeyValue : {174, 194, 208, 151...}
EffectiveTime : 16/04/2020 18:43:58
CreationTime : 16/04/2020 18:43:58
IsFormatValid : True
DomainController : CN=SRV-ADDS-01,OU=Domain Controllers,DC=IT-CONNECT,DC=LOCAL
ServerConfiguration : Microsoft.KeyDistributionService.Cmdlets.KdsServerConfiguration
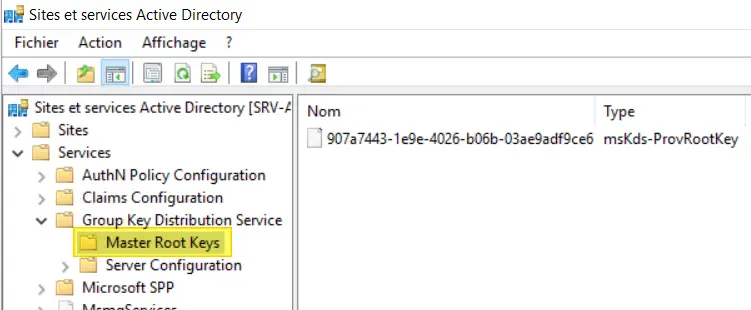
KeyId: 907a7443-1e9e-4026-b06b-03ae9adf9ce6
VersionNumber: 1If you wish to check the validity of a root key, you can use the Test-KdsRootKey cmdlet. Simply specify the Guid of the key to be checked. For example:
Test-KdsRootKey -KeyId 907a7443-1e9e-4026-b06b-03ae9adf9ce6
If the key is valid, the value true will be returned to the console.
Kds keys are visible in the "Active Directory sites and services" console, by activating the "Show services node" option in the "View" menu.
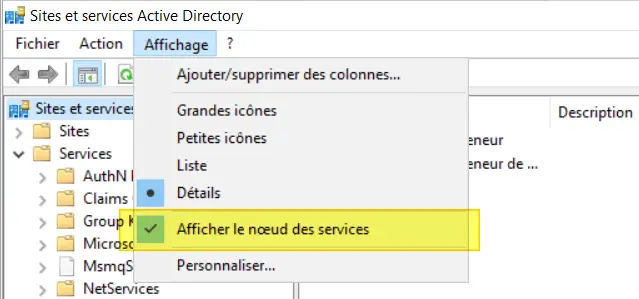
Then browse as follows: Services > Group Key Distribution Service > Master Root Keys
Now that this prerequisite has been met, we can move on to the next step.
III. Create a gMSA
To create a gMSA on our Active Directory infrastructure, we'll use the New-ADServiceAccount cmdlet and various parameters. Here's the command we'll run to create and activate a gMSA named "gMSA-01" with a password that renews every 30 days. The "SRV-MGMT-01$" computer account will be authorized to use this gMSA.
New-ADServiceAccount -Name "gMSA-01" `
 -Description "gMSA for IIS - www.it-connect.fr" `
 -DNSHostName "gmsa-01.it-connect.local" `
 -ManagedPasswordIntervalInDays 30 `
 -PrincipalsAllowedToRetrieveManagedPassword "SRV-MGMT-01$" `
 -Enabled $True
A few more explanations on the parameters :
- ManagedPasswordIntervalInDays: is used to indicate that the password should be reset every X days. This action is automatic and requires no maintenance. This attribute must be defined when the gMSA is created, after which it is read-only.
- PrincipalsAllowedToRetrieveManagedPassword: is used to indicate the object that will be able to use this gMSA, and will write the msDS-GroupMSAMembership attribute to the gMSA object. It is of course possible to authorize other objects at a later date, since a gMSA can be used by several hosts.
- DNSHostName: DNS name of this gMSA object
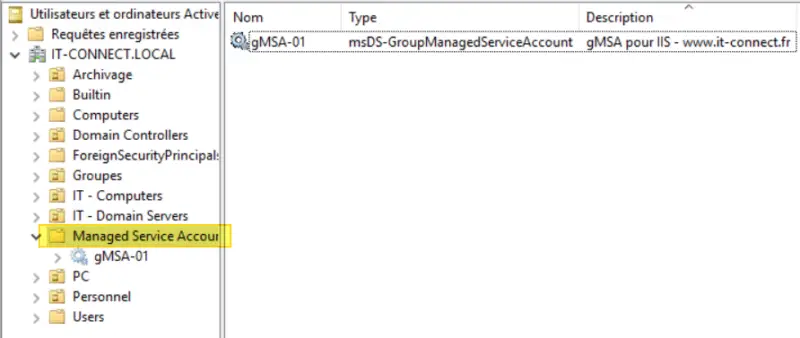
Once the gMSA has been created, it can be found in the Active Directory in the "Managed Service Account" container.
Now that the gMSA object has been created, we need to add this service account to our SRV-MGMT-01 computer object to associate it. For this action, the cmdlet to use is Add-ADComputerServiceAccount, with two parameters: -Identity for the server name and -ServiceAccount for the name or services to be linked.
Which gives:
Add-ADComputerServiceAccount -Identity SRV-MGMT-01 -ServiceAccount gMSA-01
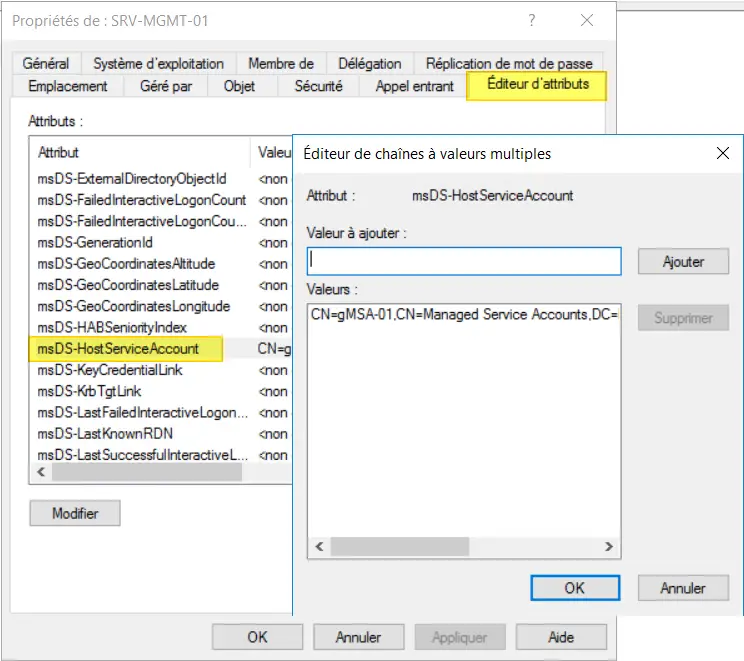
If we look at our computer object in the AD, i.e. the "SRV-MGMT-01" object, we can see that there has been a modification to the msDS-HostServiceAccount attribute. This attribute now contains a value corresponding to our gMSA "gMSA-01".
Now that we've finished creating the gMSA, let's move on to the next step.
IV. Adding gMSA to the server
To be used on a server, gMSA must be installed on that server using a cmdlet integrated into the "ActiveDirectory" PowerShell module. If you're working on a server that isn't a domain controller, you'll need to install this module. To do so, simply issue the following command:
Add-WindowsFeature RSAT-AD-PowerShell
Installation takes just a few seconds and requires no server restart.
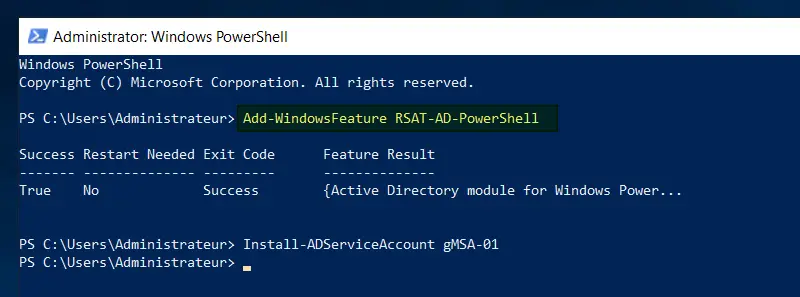
Once the PowerShell module mentioned above has been installed, the gMSA account can be installed on the server. Simply call the cmdlelt Install-ADServiceAccount and specify the name of the gMSA to be installed, as follows:
Install-ADServiceAccount gMSA-01
Once installed, you can test that it's OK with the following command:
Test-AdServiceAccount -Identity gMSA-01
This command should return"true" to the console if everything is operational.
Note: to use a gMSA account on a server, the latter must be a member of the domain.

Everything is ready, by which I mean that the gMSA is correctly associated with our server and that it is integrated on the server.
V. Using gMSA
As I said, to use a gMSA on a server, it must be a member of the Active Directory domain, but also, and this is important, it must be running at least Windows Server 2012.
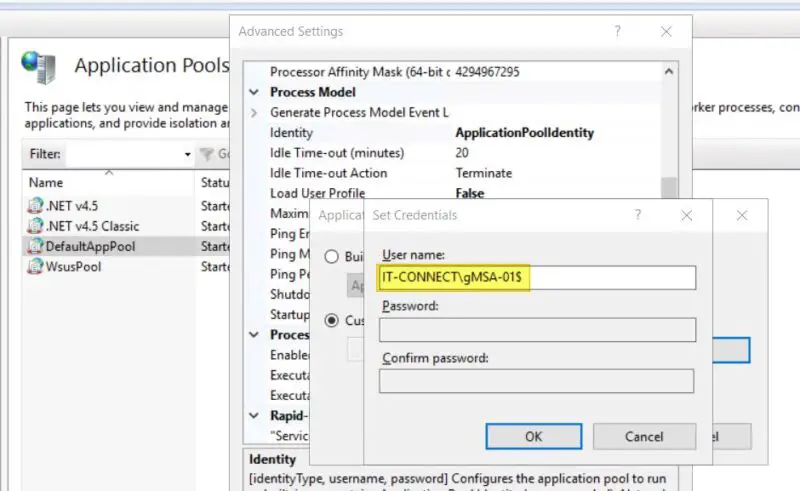
The last step is to associate it with your scheduled task, your service, etc... For example, you can use it on an IIS application pool. It's important to leave the password field blank when using gMSA. Another important thing is to add a "$" at the end of the gMSA account name, and to prefix it with the NETBIOS domain name. For the gMSA account "gMSA-01", this gives :
IT-CONNECT\gMSA-01$
VI. Uninstalling a gMSA
If the gMSA you've installed on your server is no longer needed, the best thing to do is to uninstall it from your server. To do this, from the server on which it is installed, run the following command (example with gMSA "gMSA-01"):
Uninstall-ADServiceAccount "gMSA-01"
This time, the test command must return"false".
Test-AdServiceAccount -Identity gMSA-01
This tutorial is now over, so it's up to you... For further information, please refer to the Microsoft documentation: gMSA