www.it-connect.fr
Active Directory : using a gMSA in a scheduled task
Table of Contents
I. Introduction
In this tutorial, we'll learn how to create a gMSA account and use it within a scheduled task on Windows Server to execute a PowerShell script (or anything else) securely.
Executing a PowerShell script as part of a scheduled task is a very common practice, even when using an account with elevated privileges on the Active Directory domain, in order to be able to perform the right tasks. When setting up the scheduled task, you'll need to associate a user account that will be used by Windows to run the task. For this account, you have several options, including :
- Associate the domain Administrator account (or equivalent), which is really bad;
- Associating a user account with a specific naming convention to make it look like a service account, e.g. "CDS-Srv-01", is not ideal either, as the password for this account will never be changed.
- Associating a gMSA, i.e. a real service account stored in the Active Directory, with a password that is automatically renewed at regular intervals (without any configuration on your part): now that's good!
Of course, in this tutorial I'm going to introduce you to the last option: using a gMSA account to run a scheduled task on Windows. If you're new to the concept of gMSA, I recommend you read the article below, published some time ago. Remember that gMSA accounts have been available since Windows Server 2012.
II. Creating a gMSA account
In order to create a gMSA account in our Active Directory, we need to generate a KDS root key: this is a prerequisite. Without dwelling on the subject, as I've already done previously, here's the command to run to create this famous KDS key (the Get-KdsRootKey command will allow you to see if you already have one) on a production environment(active within 10h, enough time to allow the key to replicate itself on all DCs):
Add-KdsRootKey -EffectiveImmediately
If you want to be able to use the KDS key right away without having to wait 10 hours, you can cheat by using this command:
Add-KdsRootKey -EffectiveTime ((Get-Date).AddHours(-10))
The New-ADServiceAccount cmdlet will enable us to create a gMSA named "gMSA-SRV-APPS" that the "SRV-APPS" server will be able to use. The password for this gMSA account will be regenerated automatically every 30 days. Here's the corresponding command:
New-ADServiceAccount -Name "gMSA-SRV-APPS" `
 -Description "gMSA pour tâches planifiées SRV-APPS" `
 -DNSHostName "gmsa-srv-apps.it-connect.local" `
 -ManagedPasswordIntervalInDays 30 `
 -PrincipalsAllowedToRetrieveManagedPassword "SRV-APPS$" `
 -Enabled $True
The gMSA account named "gMSA-SRV-APPS" is created in my Active Directory. We still have two things to do:
- Associate it with the SRV-APPS server in the Active Directory
Add-ADComputerServiceAccount -Identity "SRV-APPS" -ServiceAccount "gMSA-SRV-APPS
- Add him to the "Domain Admins" group, as he needs to be able to perform tasks requiring elevated privileges
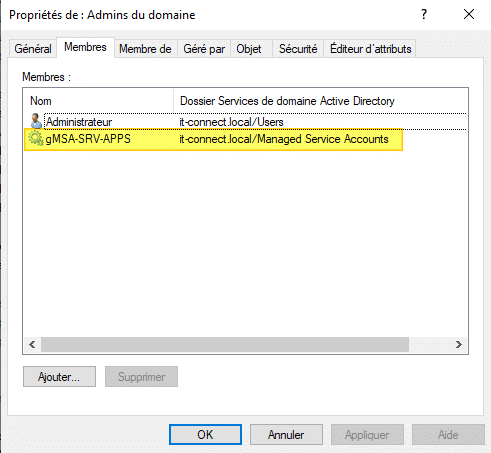
Add-ADGroupMember -Identity "Domain Admins" -Members "gMSA-SRV-APPS$"
Of course, the "Domain Admins" group can be added via the graphical Active Directory management console, just like any other object. In fact, you can check that the gMSA is in the :
Let's switch to the SRV-APPS server and use it in a scheduled task.
III. Adding gMSA to the server
The gMSA must be "installed" on the server, to use the term of the "Install-ADServiceAccount" command we're going to use. To use this cmdlet, you need the PowerShell Active Directory module on the local host (Add-WindowsFeature RSAT-AD-PowerShell). Then install it, calling it by name:
Install-ADServiceAccount "gMSA-SRV-APPS"
All that remains is to create the scheduled task and use gMSA.
IV. Creating a scheduled task with gMSA
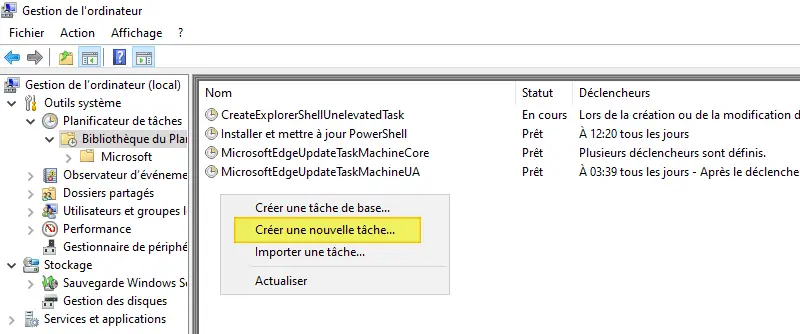
To create the scheduled task, you'll see that it's, apart from one detail, a classic procedure for creating a scheduled task on a Windows machine. Open the "Computer Management" console, then "Task Scheduler" in the left-hand menu. Right-click and select "Create new task". We could create the scheduled task using PowerShell, but that's not the most intuitive way.
The wizard will start, and we'll be able to configure the scheduled task. For my part, I call the task "PowerShell Script - Copy a file to all computers", but you won't care! 🙂
This scheduled task will execute the "C:\Scripting\Copier-Fichier-PC.ps1" script, which has a very simple objective: to copy a file to each AD machine contained under the "PC" OU. Here's the code, for your information:
$PCList = (Get-ADComputer -Filter * -SearchBase "OU=PC,DC=it-connect,DC=local").name

Foreach($PC in $PCList){
 Copy-Item -Path "C:PartageIT-Connect.txt" -Destination "\$PCPartage"
}
What's important are the security options. Click on the "User or group" button to select gMSA as the account used by the scheduled task. A window will open... Click on "Locations" and select "Entire directory" (not your domain) then "Object types" to select "Service accounts".
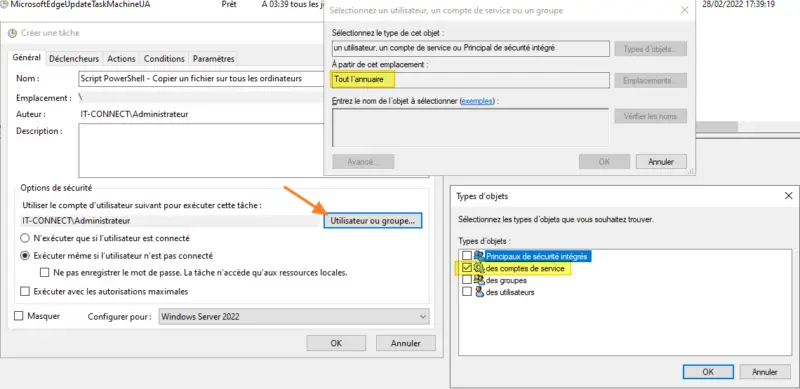
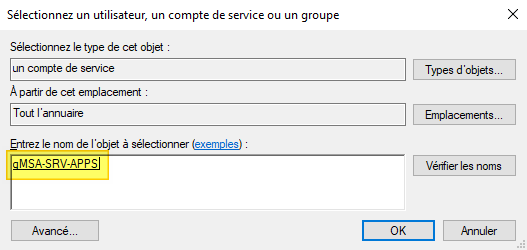
Once this is done, enter your gMSA's name (or the beginning of its name) and click on "Check names". The gMSA should now be found: all that remains is to click on "OK".
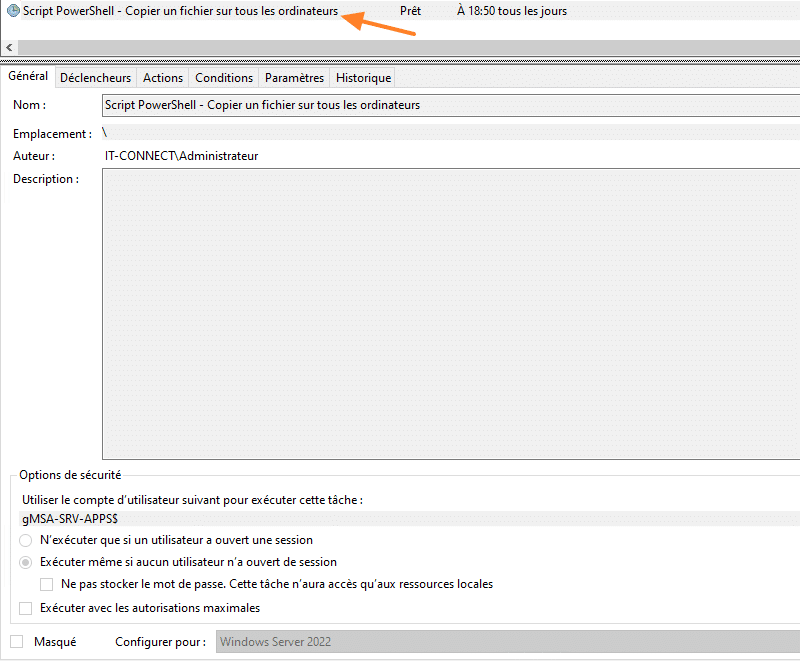
That's it, the scheduled task will run with our gMSA account! 🙂
In the "General" tab, check "Run even if user is not logged in" and "Configure for:", and choose the highest Windows version from the list.
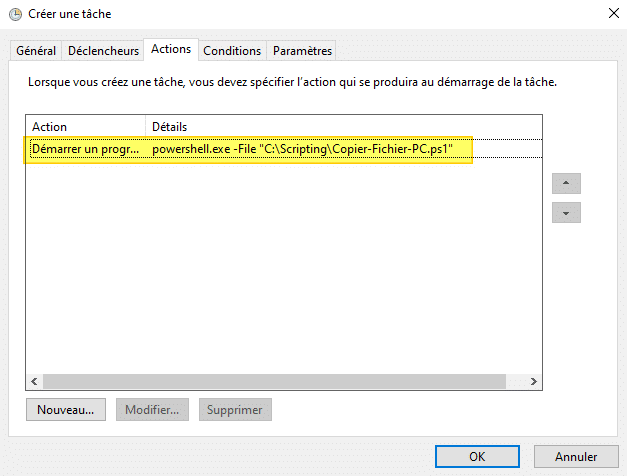
For the rest, we need to define a trigger, then an action. For the action, we'll use our PowerShell script: click on the "Actions" tab, then on "New". Specify :
- Program/script: powershell.exe
- Add arguments: File "<path to script>" (for me: -File "C:\Scripting\Copier-Fichier-PC.ps1")
Which gives:
All you have to do is confirm, and the scheduled task is ready. Finally, I leave it to you to adjust the other parameters to suit your needs, if you wish.
V. Allow gMSA to connect as a task
In order for the gMSA account to be able to run the script via the scheduled task, it must be authorized to log on as a task. Otherwise, the script won't be able to run in principle (but I've come across cases where it works without this parameter). To do this, you need to create a GPO and apply it to the server(s) that will be using the gMSA, or modify the local policy (gpedit.msc).
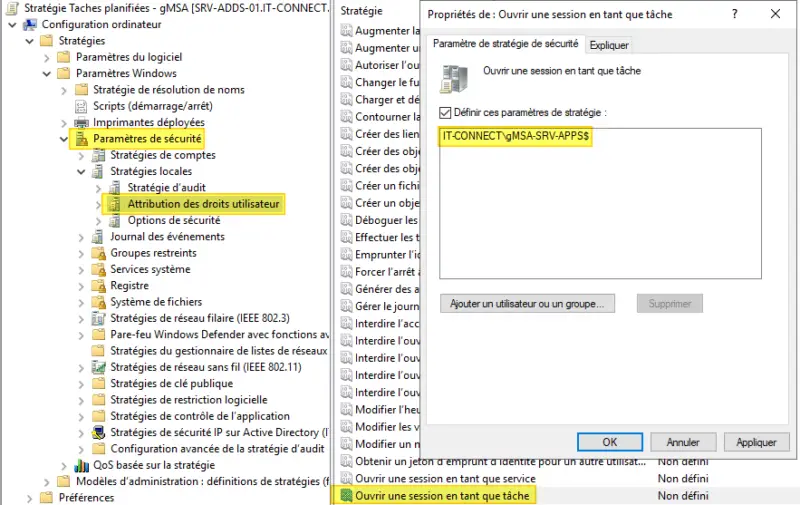
If a GPO is used, which will be the case in production, this parameter must be modified:
Computer configuration > Strategies > Windows settings > Security settings > Assigning user rights > Log on as a task
This parameter must be defined and the gMSA selected, in the same way as for selection within the scheduled task.
Thanks to this additional change, the PowerShell script will run as a scheduled task without any difficulty! 🙂
I strongly encourage you to run your scheduled tasks (and other services) with gMSA accounts to strengthen the security of your Active Directory-based infrastructure.